
Welcome back from part one (Receiving aircraft ADS-B (position) signals)! Now that you have all the required equipment – what do you need to do to set it up? Thankfully, the folks over at FlightAware have made this super easy. FlightAware provides a flight tracking platform that is mostly fed by users like me (and soon to be you!). In return for feeding them data, they will give you a free enterprise subscription, which is normally $89/month. It adds a lot of tracking abilities which are great for aviation nerds like myself. To get the most data possible, they have put together some great getting started guides, which I will link here – https://flightaware.com/adsb/piaware/build. The short version is:
- Write the Piaware operating system to your SD card
- Either enable WiFi or plug into your router
- Plug everything in
- Claim your station on FlightAware.com after a few minutes
- Watch the data start flowing!
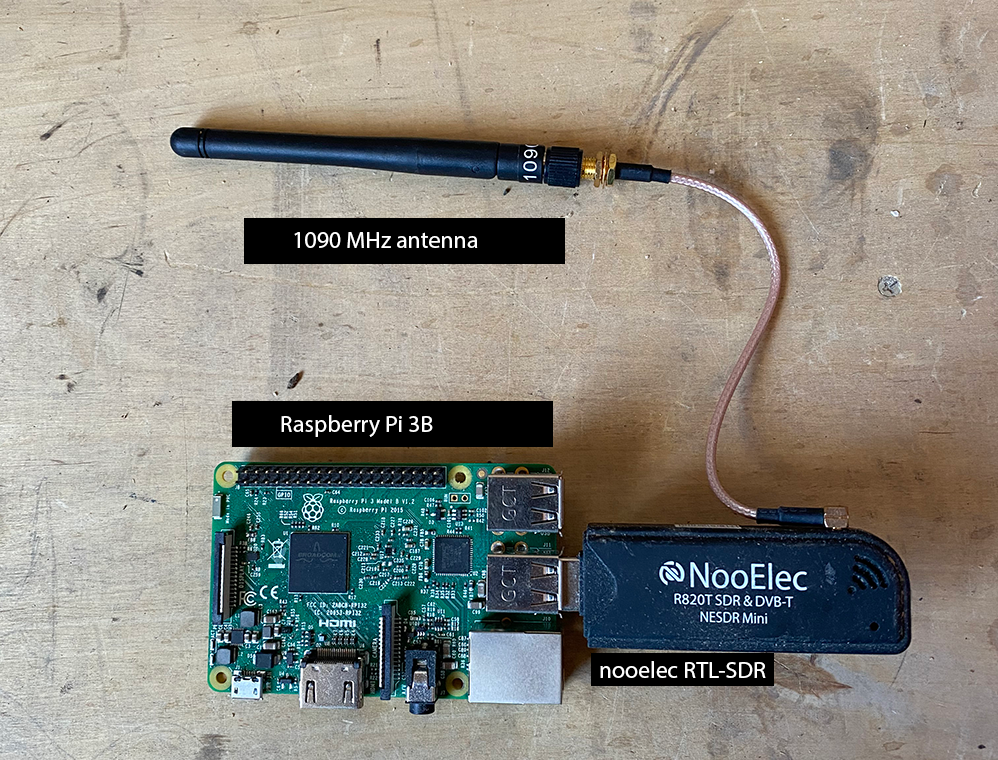
Here is a picture of the most basic setup possible:
To really increase your reception, there are three things you need to do (but before you proceed, I must warn you – this becomes addictive):
- Get a bigger/better antenna. Antennas are measured by something called “gain”. The more gain, the better (generally speaking). More gain means the same signal is received stronger and with more clarity.
- Reduce the other noise. A bigger antenna will amplify all signals in the same frequency range. ADS-B is on a very specific frequency (1090 MHz). An ADS-B filter reduces the signal at frequencies other than 1090 MHz.
- Amplify the filtered signal. With the other signals filtered out, amplify what remains (legit 1090 MHz ADS-B signals).
This is what my full setup looks like:
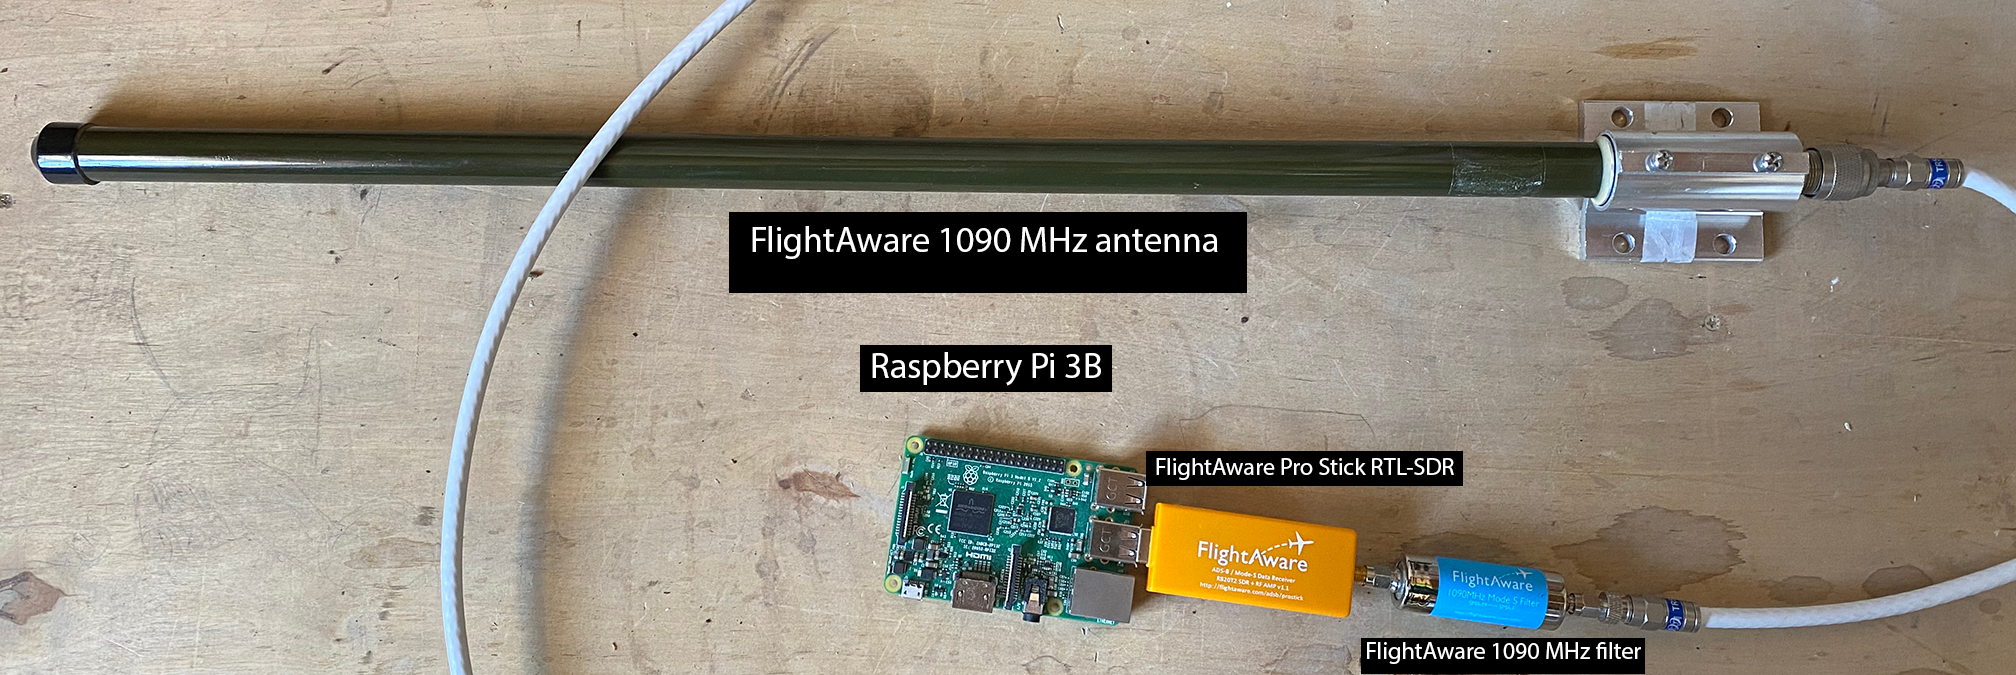
FlightAware started producing each of these a couple years ago (again, sticking with the theme of making it easy to provide them data). Originally, each was a separate item. Now the amplifier and filter are built into the same device on the FlightAware Pro Stick Plus. The antenna will remain separate. These upgrades together will cost around $80-90. I’ve provided some Amazon links below to check the current prices:
- FlightAware 1090 MHz ADS-B Antenna – 26 in
- FlightAware Pro Stick USB ADS-B Receiver
- AirNav RadarBox 1090 MHz ADS-B Filter
- Combined receiver and filter – FlightAware Pro Stick Plus (seems like it is currently unavailable on Amazon but in stock on eBay)
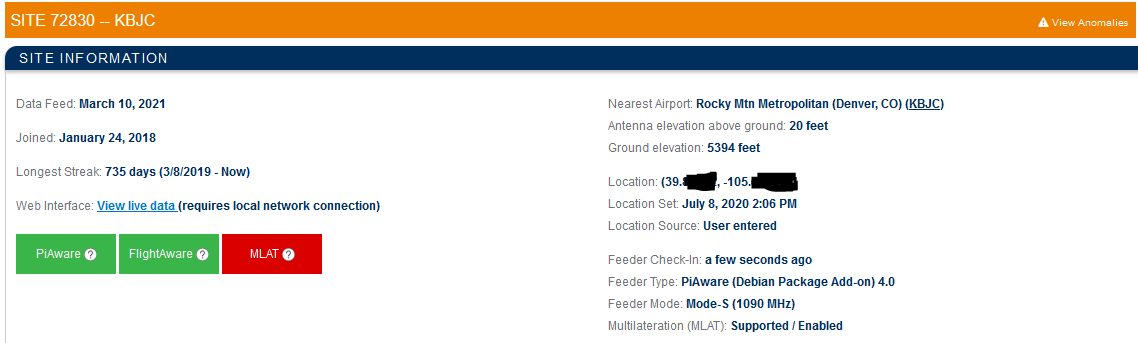
I like to keep the filter and receiver separate so if something goes wrong with either I can keep sending signals. As a side note, I am up to 735 days feeding FlightAware without interruption (two years and two days)!
The antenna is currently hanging in my garage which isn’t ideal but I still get signals from 100+ miles away consistently. I messed with a bunch of DIY antennas that I’ll post one day but settled on the FlightAware stuff because it works so well. I have the full setup of FlightAware antenna feeding the 1090 MHz SMA filter into the Pro Stick. When I lived in California this yielded 100-200 planes on busy days up to 200 miles away. This stuff is good fun, and as I warned above, it gets addictive. There is a physical limit though to how far you can receive signals, and that limit is around 250 miles for planes at 40,000 ft due to the curvature of the earth. Planes flying lower will fall off at closer distances.
Repositioning the antenna
I moved the antenna up a bit and am getting 20% more messages per second and distance – take a look here at Receiving aircraft ADS-B (position) signals – part 3 (antenna reposition)
Please let me know in the comments what you want to see about my setup! I will get around to making YouTube videos eventually to post because I know a lot of people like videos more than text but I want to do the text stuff first to get my thoughts together.
Austin’s Nerdy Things is a participant in the Amazon Services LLC Associates Program, an affiliate advertising program designed to provide a means for sites to earn advertising fees by advertising and linking to amazon.com.
2 replies on “Receiving aircraft ADS-B (position) signals – part 2”
Austin, how long is your coax run? What type of coax are you using?
I’ve considered putting the pi, both the 1090 and the 978 dongles, a voltage regulator, and a higher voltage ac power lead running up to the pi.
I’m thinking 24VAC (thermostat transformer) to a full wave bridge, some filtering caps, to a buck voltage regulator.
This should be cheaper than the coax, amp, filter, outside antenna.
I was going to put the pi in pvc pipe, with a concentric sun shield to keep the sun from heating the enclosure.
Thoughts?
Thanks.
(The other thought was to use a powered usb hub, connected to a long range usb extension booster pair.. with the pi indoors.)
I’m using regular tv coax (RG-6 I believe), probably 50′. It isn’t ideal but it does work very well. I’m the 2nd highest contributor on FlightAware in my area. I’m about to migrate things to my roof and run off a solar panel and WiFi.
Your plan seems like a pretty solid plan. That said I’m not sure if there will be RF noise issues with your regulator and such.
Long USB would work but 1A over long distances with the tiny wires can get tricky.