Introduction – what is SDR?
SDR stands for software defined radio. It is a term used to describe devices that can receive radio frequency signals over a wide range of frequencies. These devices most commonly interface with USB drives of computers / Raspberry Pi / similar. There are standalone-devices but they often cost quite a bit more than the USB devices. The best part about the base-level SDRs? They’re less than $50. I have a couple that I paid $18 for.
Video link to follow along – https://youtu.be/HUkaIJhoYUs
So you’re here on the “Getting Started with SDR” post. In this SDR tutorial post we’ll get a SDR plugged into your Windows computer, install drivers, and start sniffing for signals. We’ll try FM radio first since they have very powerful transmitters and there is almost certainly one you can receive at your hose, followed by checking for those wireless temperature sensors, and then some aircraft position signals.
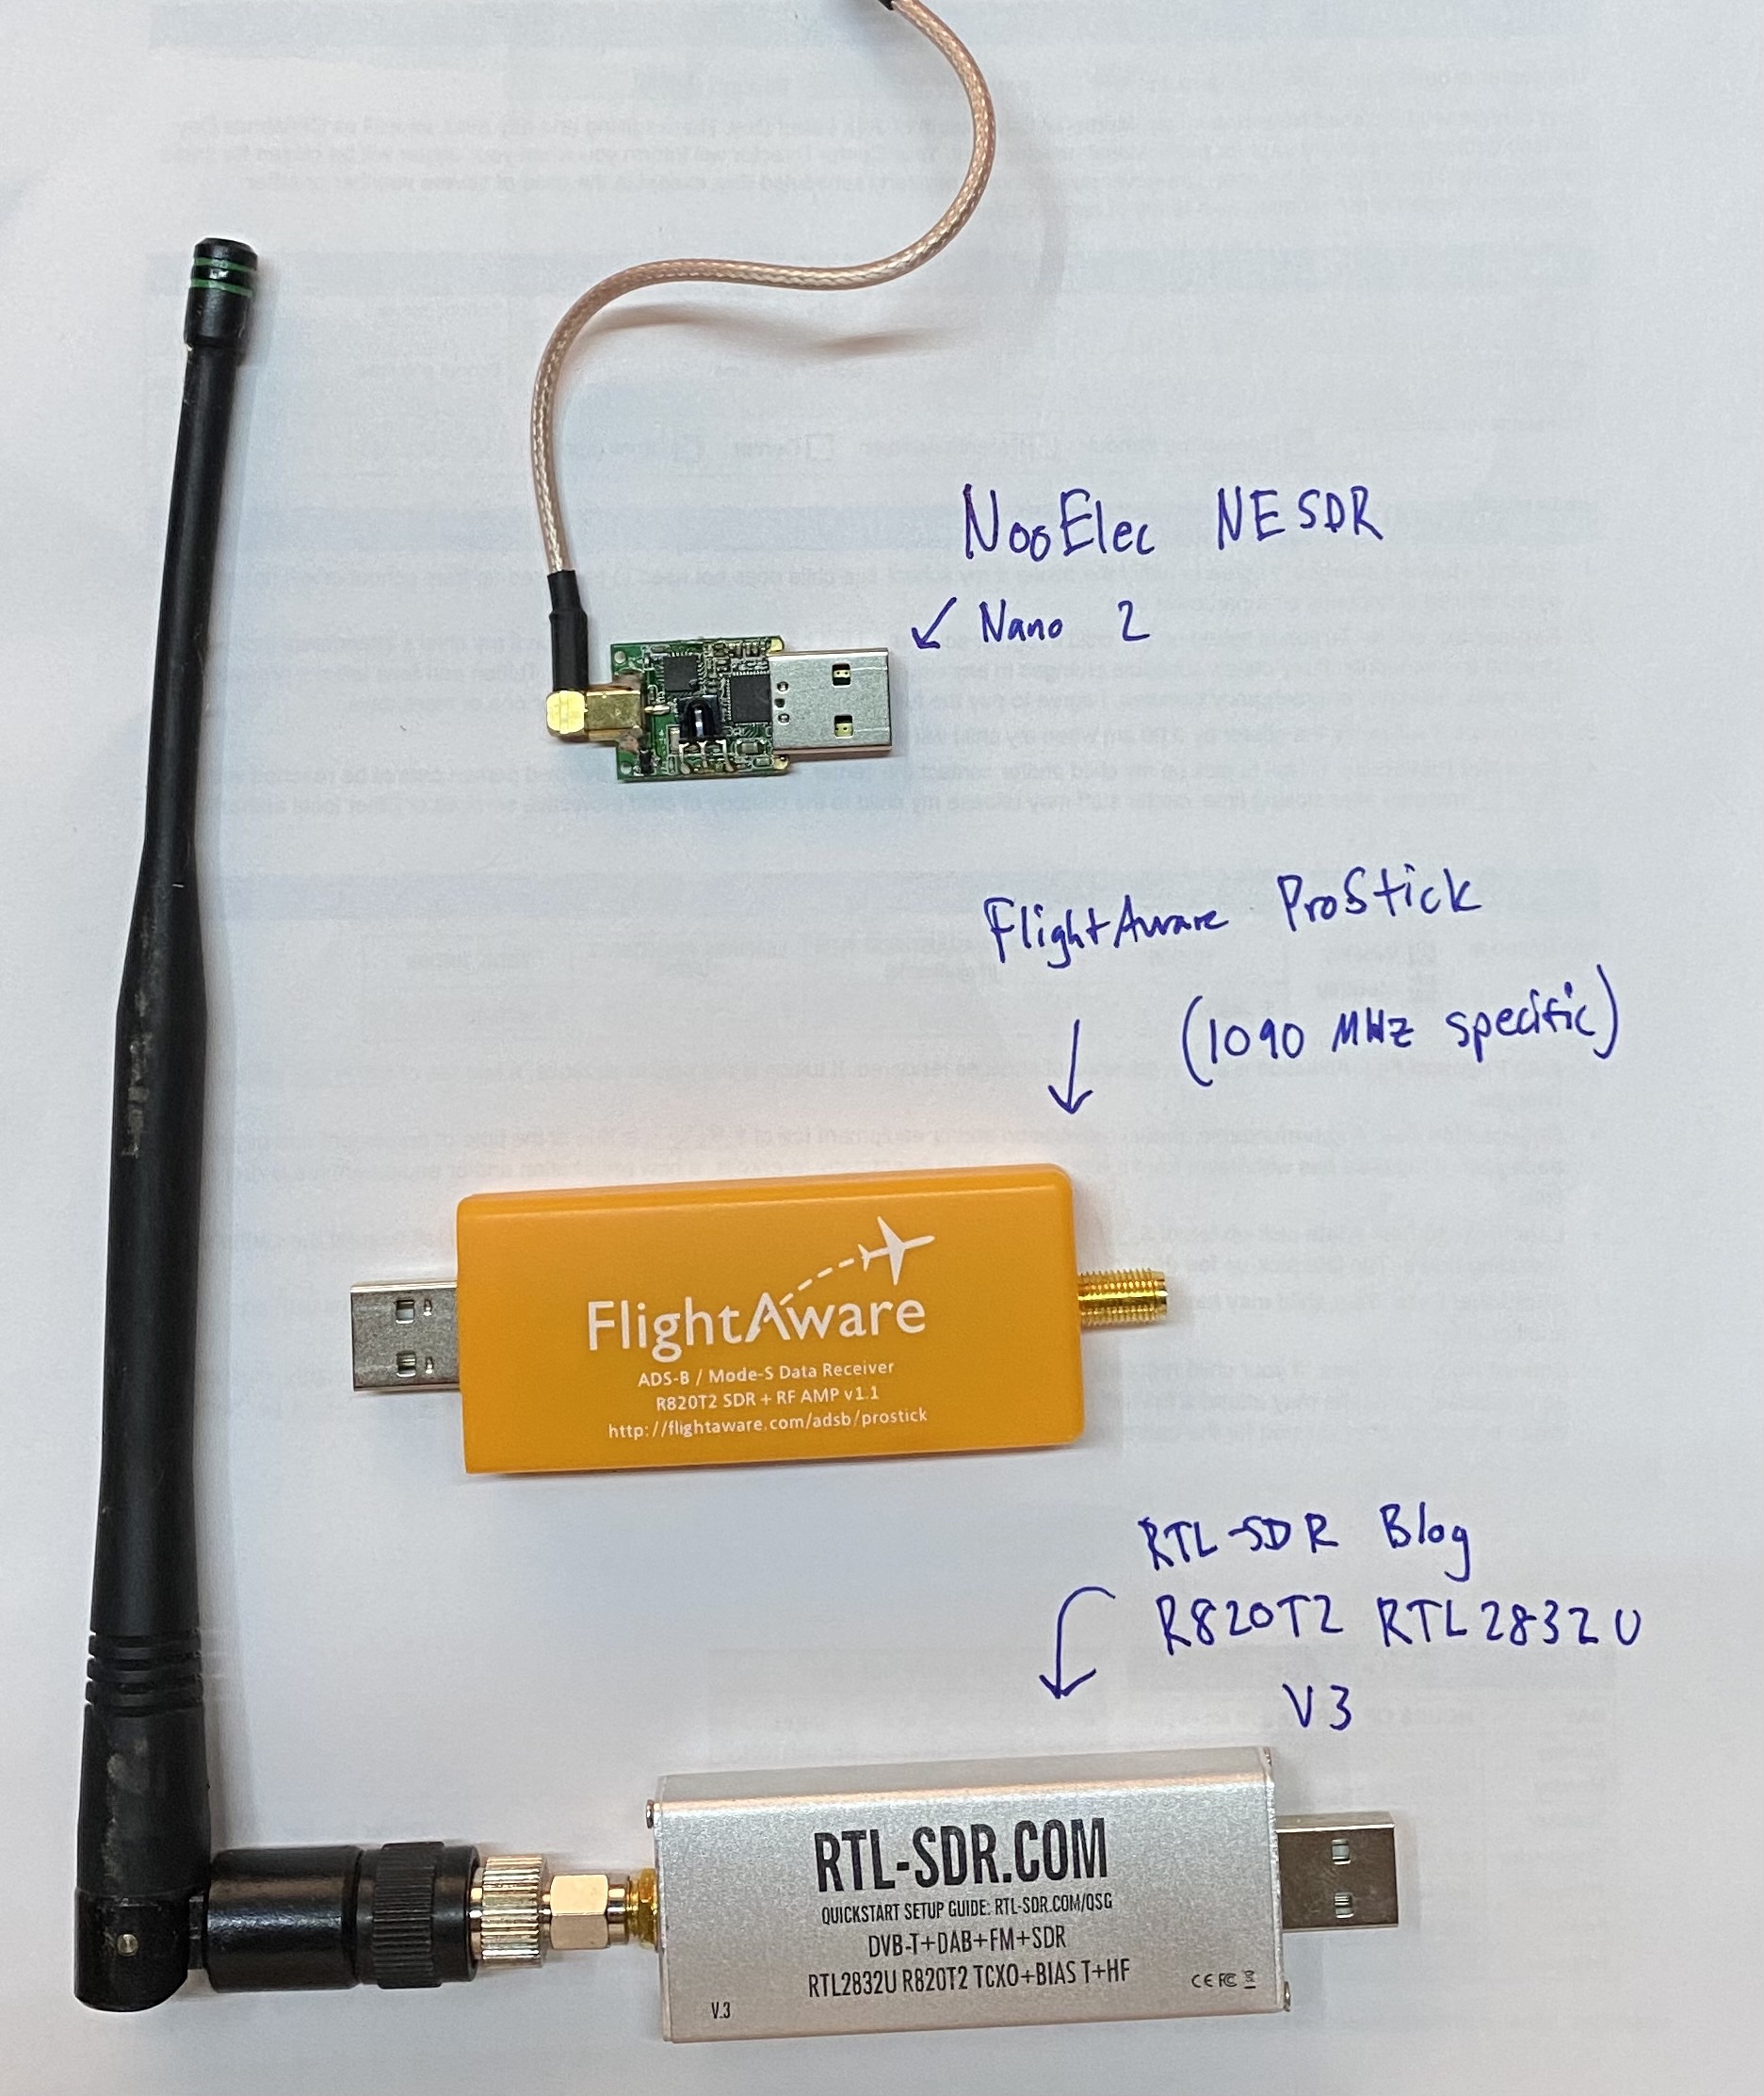
What does a SDR look like? Below is a image with 3 I have around the house that I snagged for a picture (USB plug for size reference). Below the picture is the table of contents for the post.
SDR Tutorial Contents
- Purchasing a suitable SDR
- Plugging it into a Windows computer and installing drivers
- Installing SDR# (a program to monitor any and all frequencies)
- Listening to a FM radio station
- Installing rtl_433 and listening for wireless temperature sensors
- Installing dump1090 and listening for aircraft position signals
1 – Purchasing a suitable SDR
To get started, you’ll obviously need a RTL-SDR. I recommend the NooElec devices, specifically the NooElec NESDR Smart v5 bundle. NooElec devices have lasted the longest out of the 8 SDRs I’ve purchased and have been very useful for me. It includes 3 different antenna (433 MHz for sensors, 1090 MHz for ADS-B aircraft signals, and an adjustable antenna) which are useful for the rest of the tutorial:
With a SDR in hand, let’s get started!
2 – Installing drivers and plugging in the RTL-SDR
I use Windows 10 for this SDR tutorial, but I use Linux for the long-term monitoring I have in place around the house. Linux doesn’t ever automatically reboot for updates, and is generally much more stable (and doesn’t need a license). Windows is easy to get started so we’ll use it.
The instructions for installation are a bit long so I’ll just leave a link to the official source where they will always have the most up to date drivers and such – https://www.rtl-sdr.com/rtl-sdr-quick-start-guide/. I will re-write these at some point (and also make a video) but I’ll just leave the link for now.
3 – SDRSharp installation
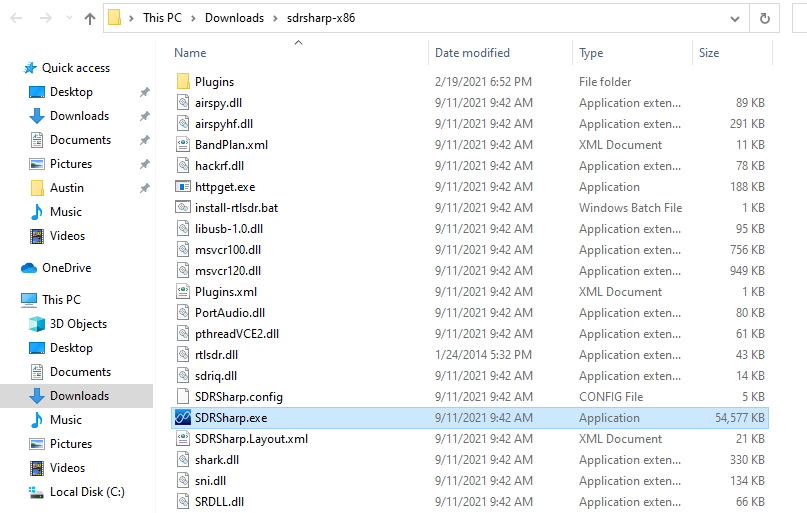
If you followed the instructions in the link above, you should have a file called SDRSharp.exe in the folder you used:
This means it is already “installed” since it is just a simple executable file. No need to click next, next, next finish to install.
4 – Listening to a FM radio station with your RTL-SDR
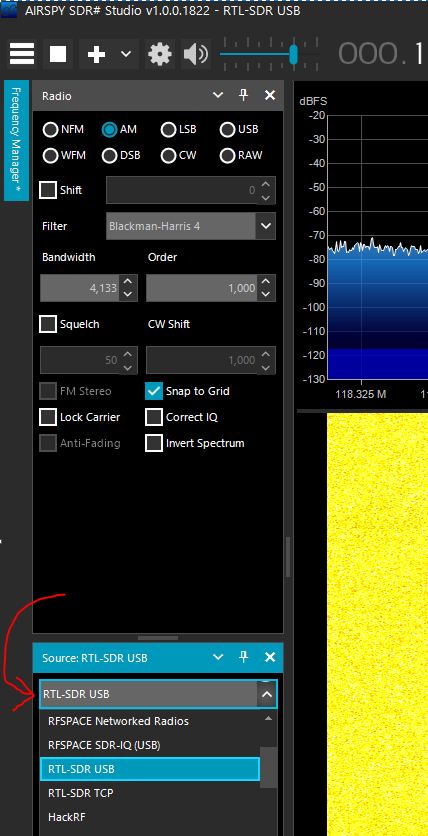
Go ahead and double-click on SDRSharp.exe and launch it! First thing you need to do is select the RTL-SDR USB option from the sources drop down menu:
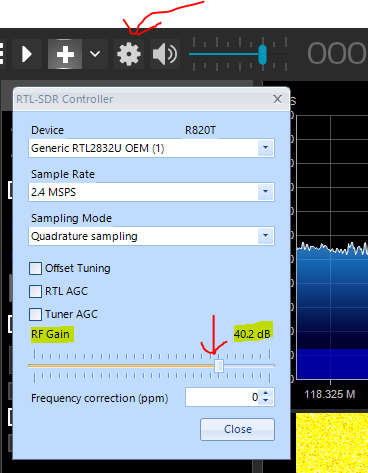
Next up, we need to crank the gain to get useful signal out of the SDR. Click the gear icon, make sure the RTL2832U device is selected, then set the RF gain slider to around 40dB, then click close:
Now we are ready to listen to FM radio!
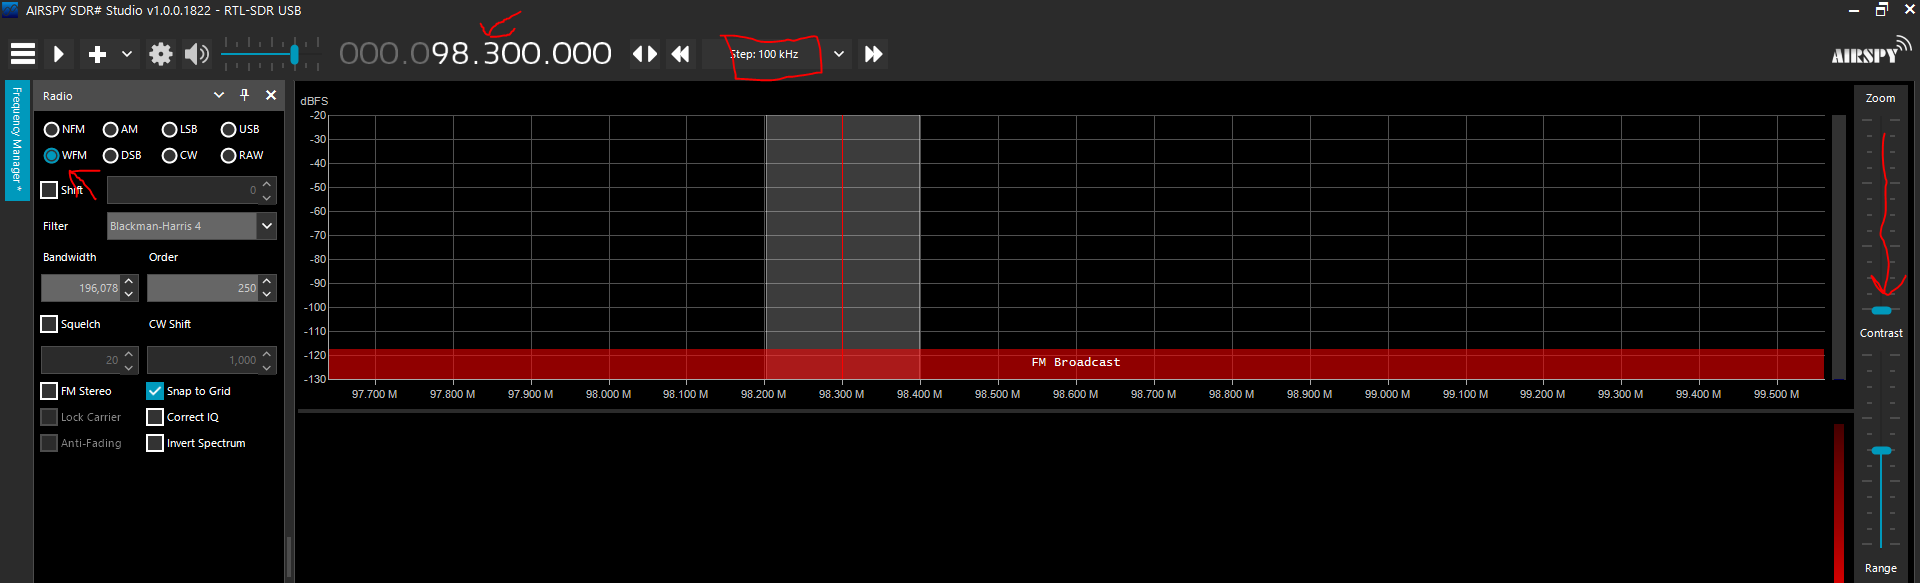
Ensure the WFM radio button is selected in the signal type, set the zoom slider all the way down, set the step to 100 kHz, then click the frequency numbers up/down to pick a known FM station. This should get everything ready to go:
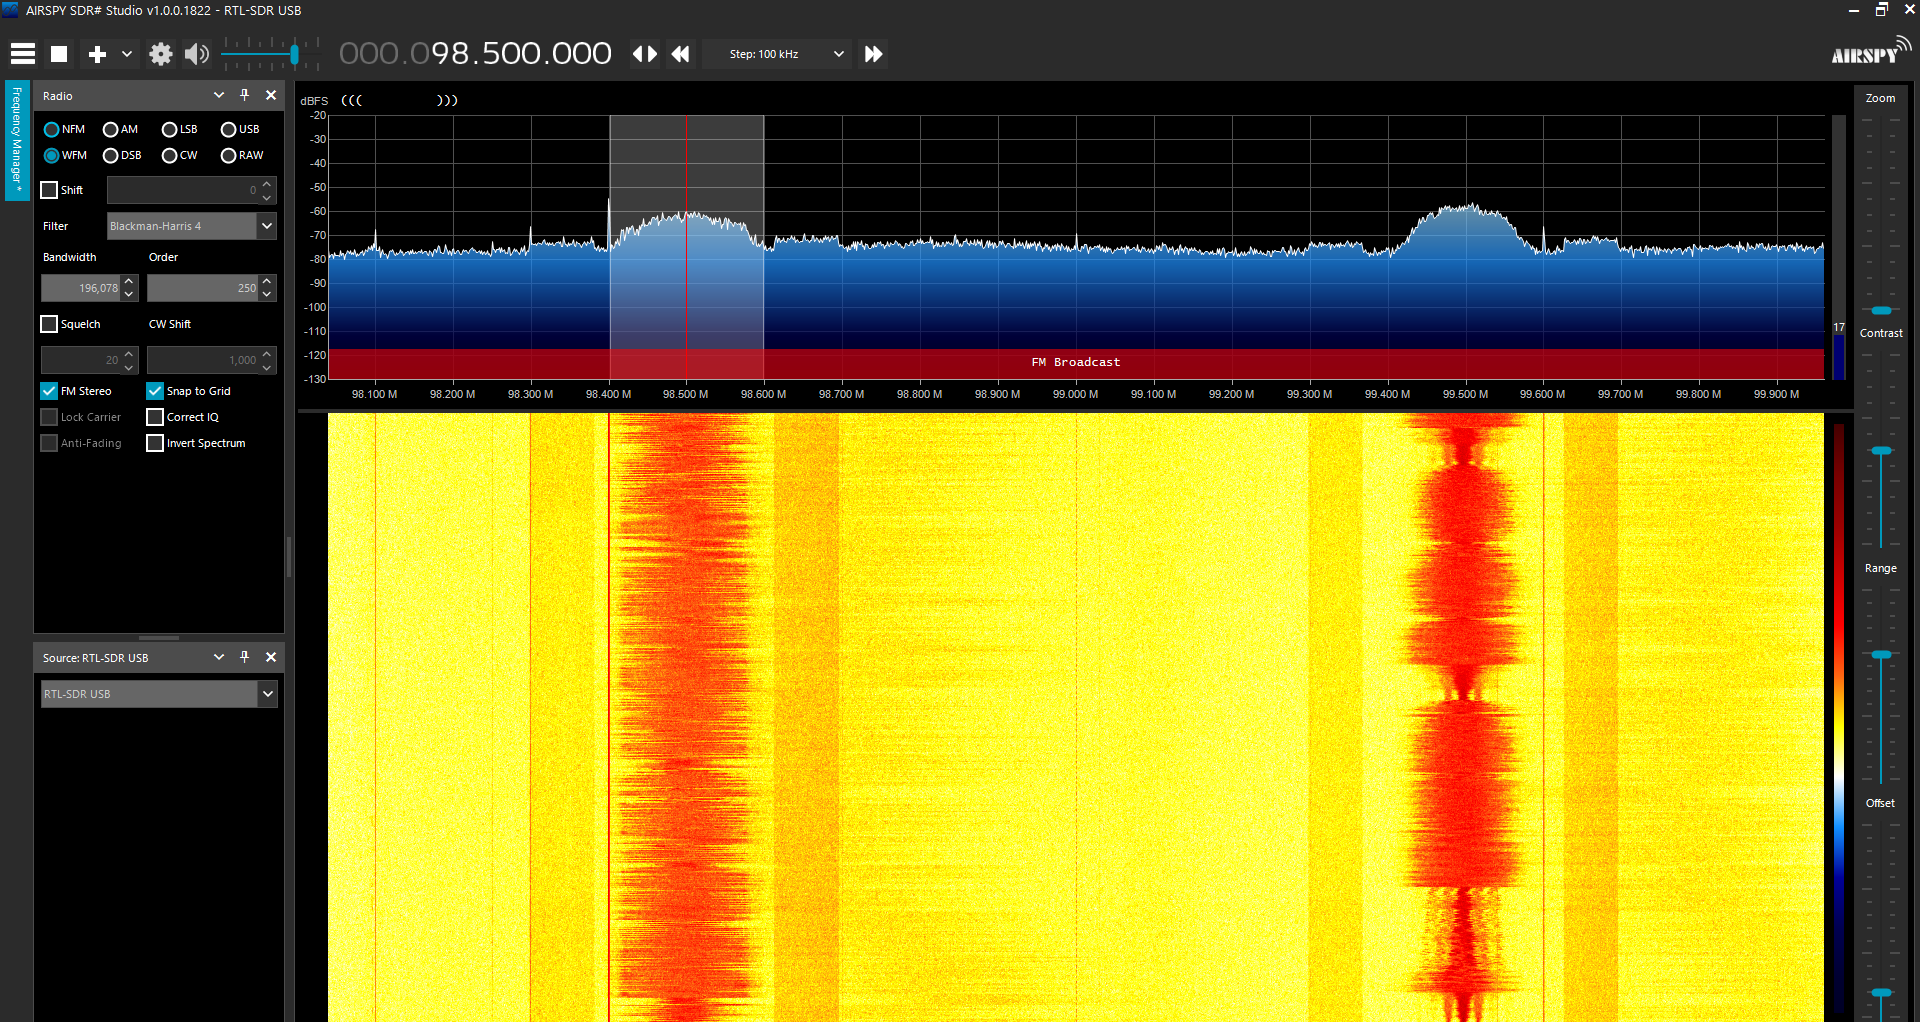
With all that setup out of the way, click the play button and watch the signals start streaming in! Assuming your speakers are set to a decent volume, you’ll hear the radio from your computer! From my 2nd story bedroom near Broomfield, CO, I can easily get 98.5 MHz and 99.5 MHz (and many others). You can also check the “FM Stereo” checkbox on the left side if you know you’ll be receiving FM stereo. Make sure you uncheck it if you start looking at other things:
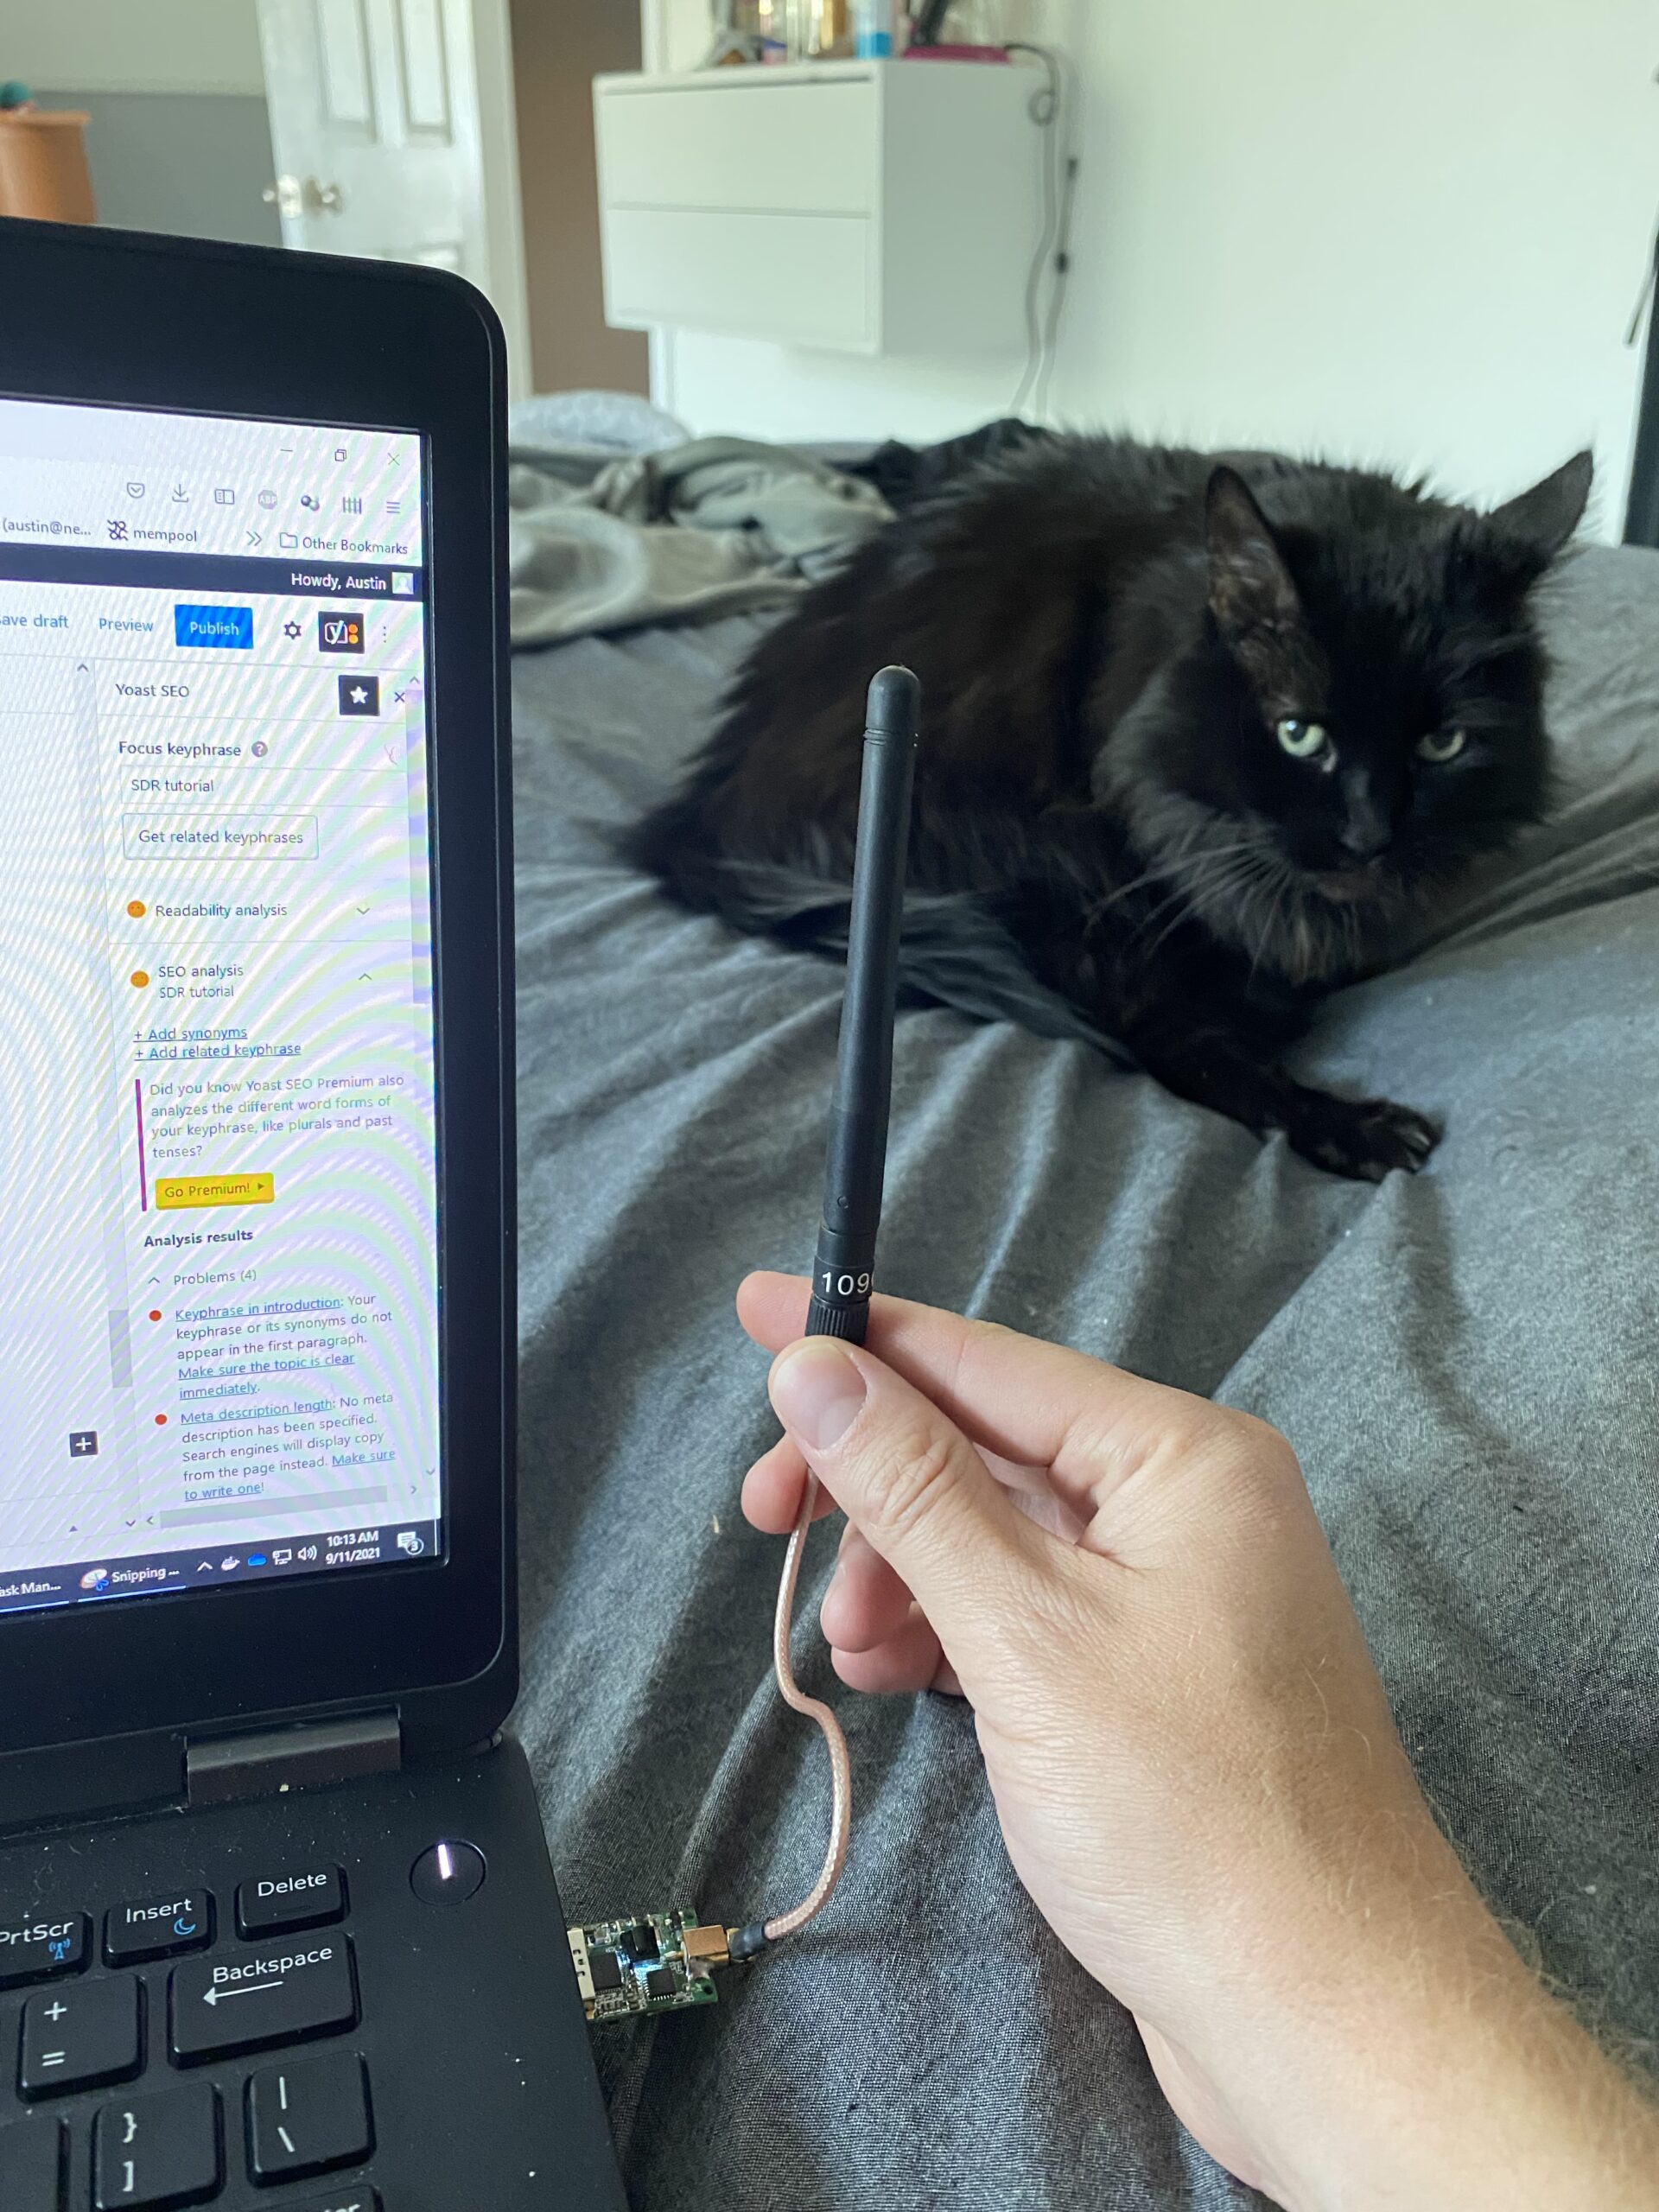
Here is a picture showing my setup for writing this blog – a simple NooElec Nano SDR I bought in 2016, a little bit of cable, and a 1090 MHz antenna (which is clearly not ideal for FM radio frequencies, but radio is so powerful it doesn’t really matter). Also say hi to Fluffy the cat:
5 – Installing rtl_433 and listening for wireless temperature/humidity sensors
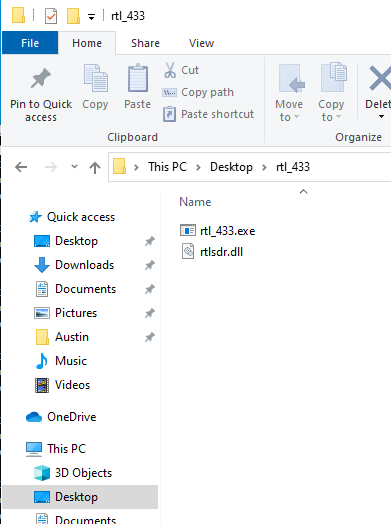
Ok so now that we know radio works, let’s see what other radio frequency signals are traveling through the air. We will start by downloading the rtl_433 Windows release from GitHub. The latest version as of this post is here (https://github.com/winterrace/rtl_433_win/releases/download/v19.8.19/rtl_433_win_2019-08-19.zip). Unzip the .zip file. There should be two files inside, rtl_433.exe and rtlsdr.dll. I put these files on my desktop in a folder called rtl_433:
Now open a command window, and change directory (cd) to Desktop/rtl_433.
C:\Users\Austin>cd Desktop\rtl_433

C:\Users\Austin\Desktop\rtl_433>
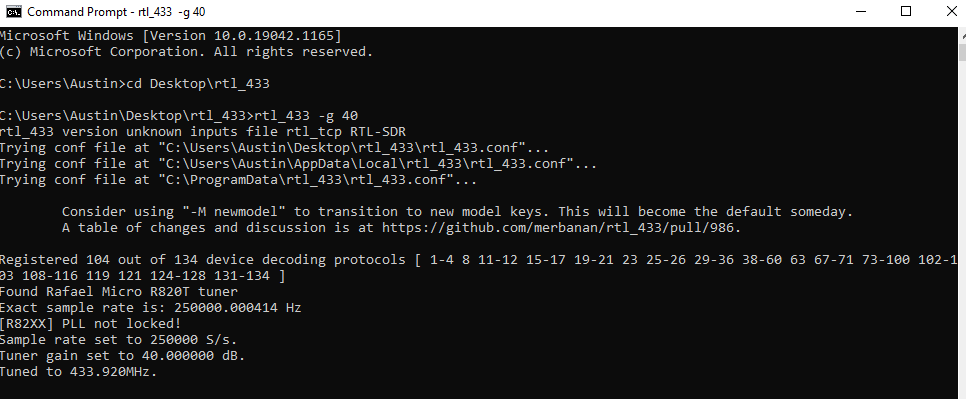
Ok now we’re in the rtl_433 directory so we can run commands now. The most basic command for this program is to run it and only specify the gain. We used 40 dB for the FM radio so let’s use 40 again by specifying it with the -g option (you can view all commands by running rtl_433 -h):
rtl_433 -g 40
The output will show the following (ending in “Tuned to 433.92 MHz”) if all went well:
Let it run for a couple minutes. You might see some thermometers and other such devices! Here is what my output looks like after about 60 seconds:
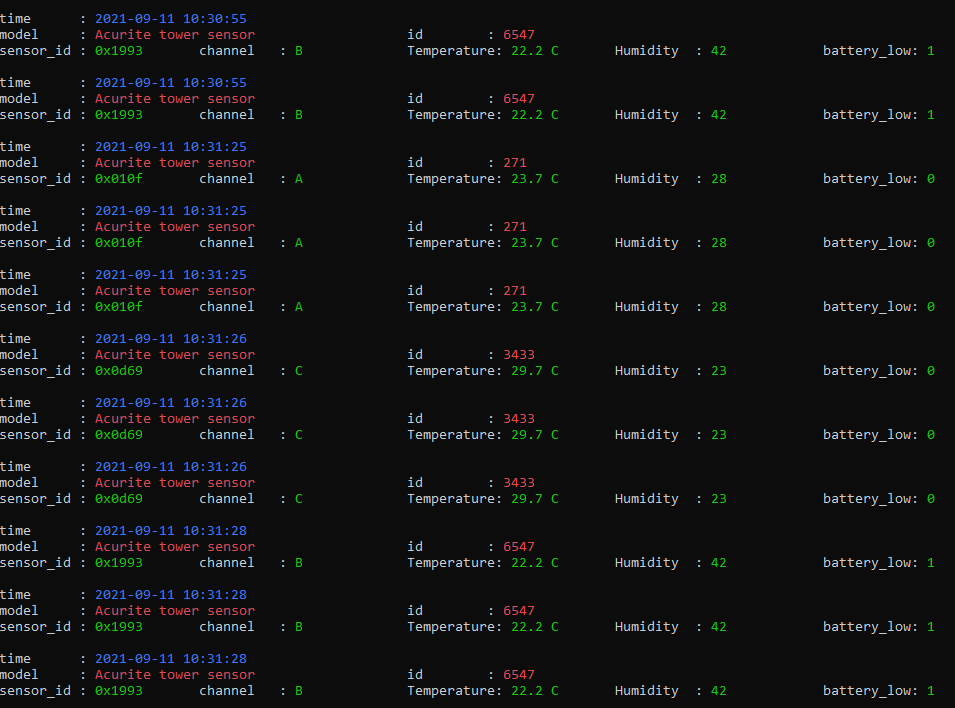
If you look closely, you can see there are three separate devices broadcasting on 433 MHz that I can pick up with my (still not desirable) 1090 MHz antenna! One is sitting in my garage, another is next to me in the bedroom, and I don’t actually know where the 3rd is or who owns it.
With the same, tiny USB RTL-SDR, we have picked up FM radio as well as temperature/humidity readings from three separate sensors!
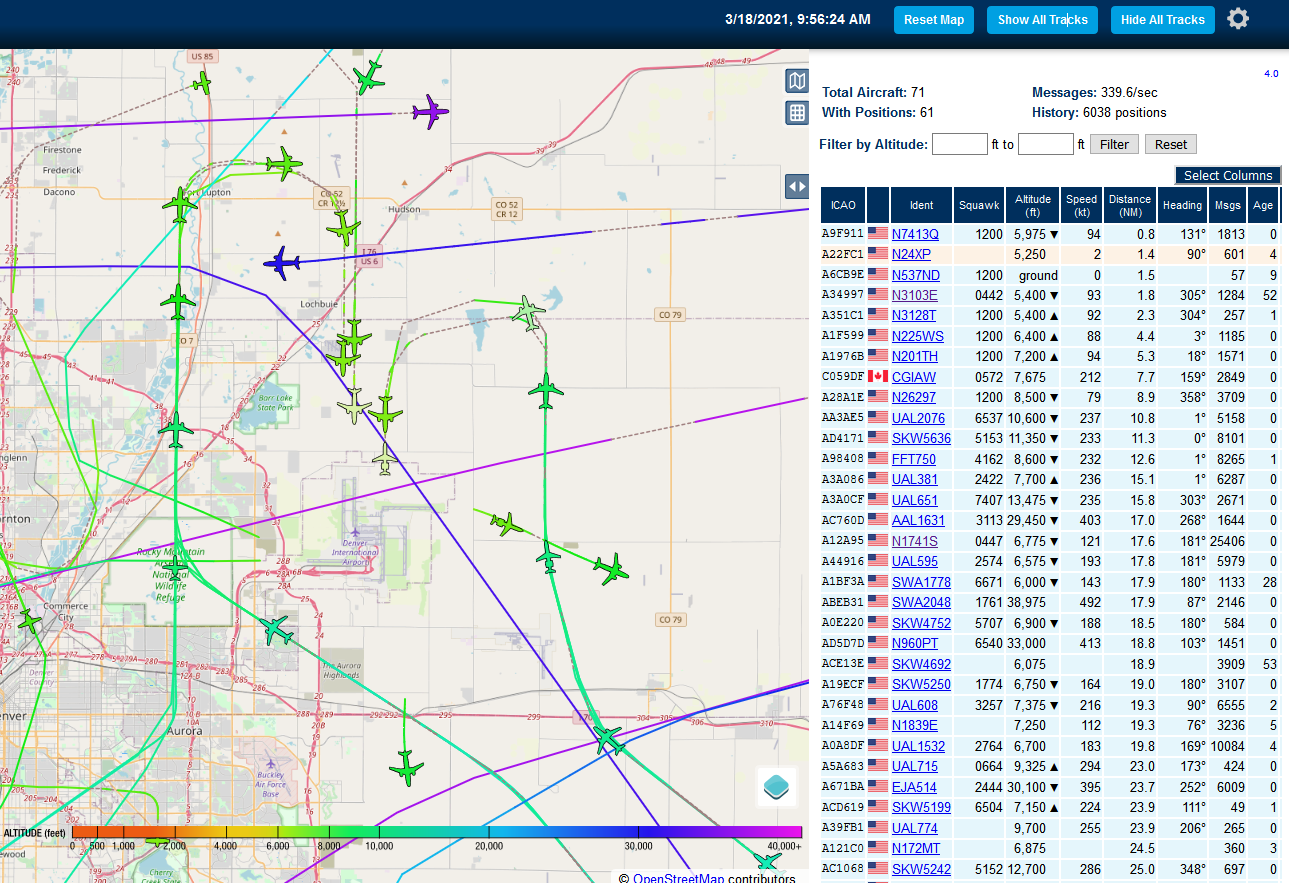
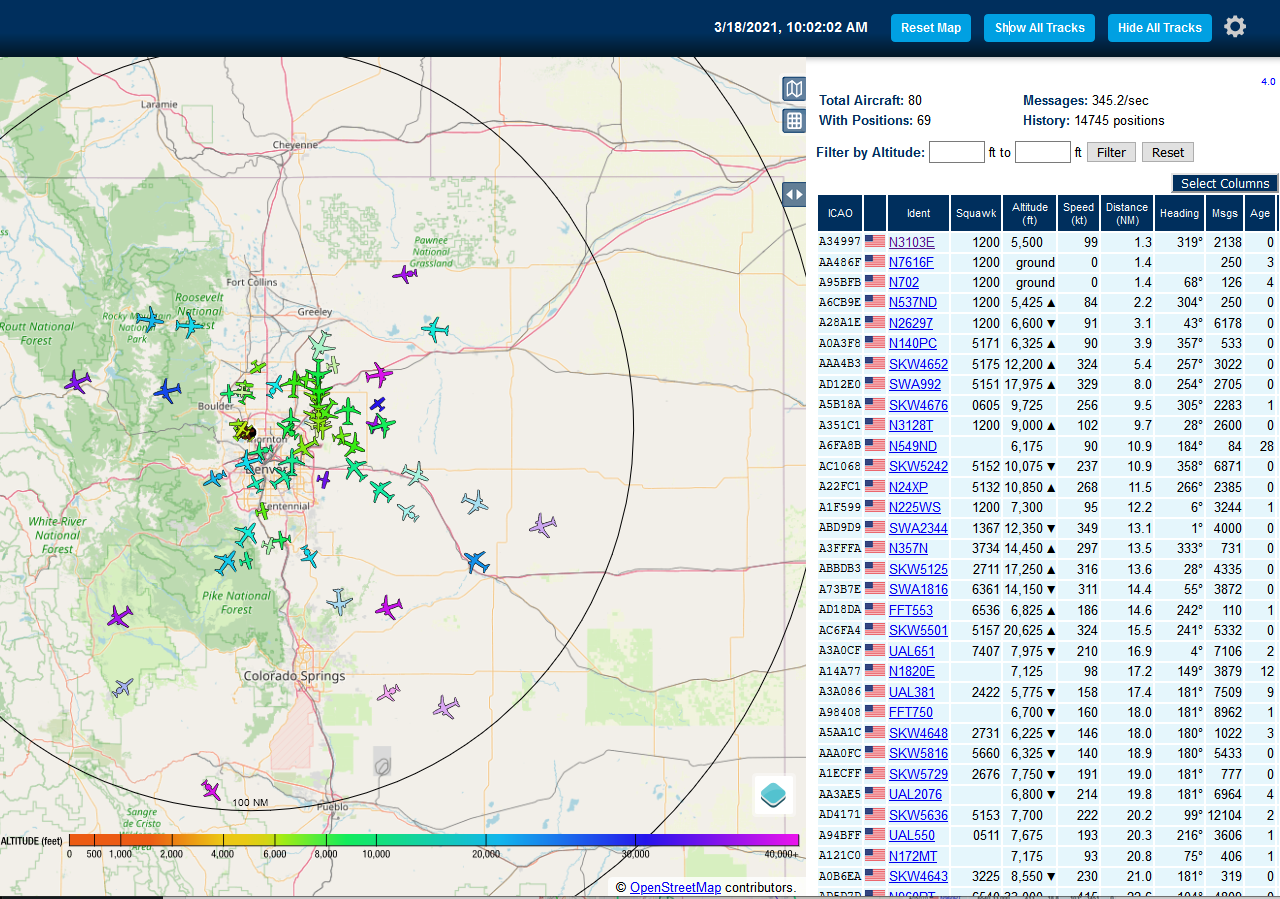
6 – Installing dump1090 and listening for aircraft position (ADS-B) signals
Last up for this RTL-SDR tutorial is installing dump1090 and checking to see if we can pick up any aircraft signals.
Dump1090 is a utility written many years ago that decodes aircraft ADS-B position signals. Some brave souls ported it for use in Windows a while ago. Using the directions and links from https://sonicgoose.com/using-dump1090-in-windows/ I have distilled it down for you. Download the dump1090 windows package that I’ve rehosted here –
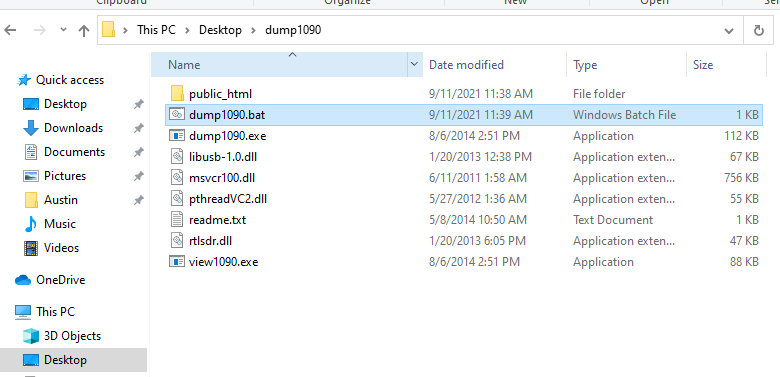
And then extract it to your desktop in a folder called dump1090.
There is a .bat file (batch file) in the folder, double-click it to run it:
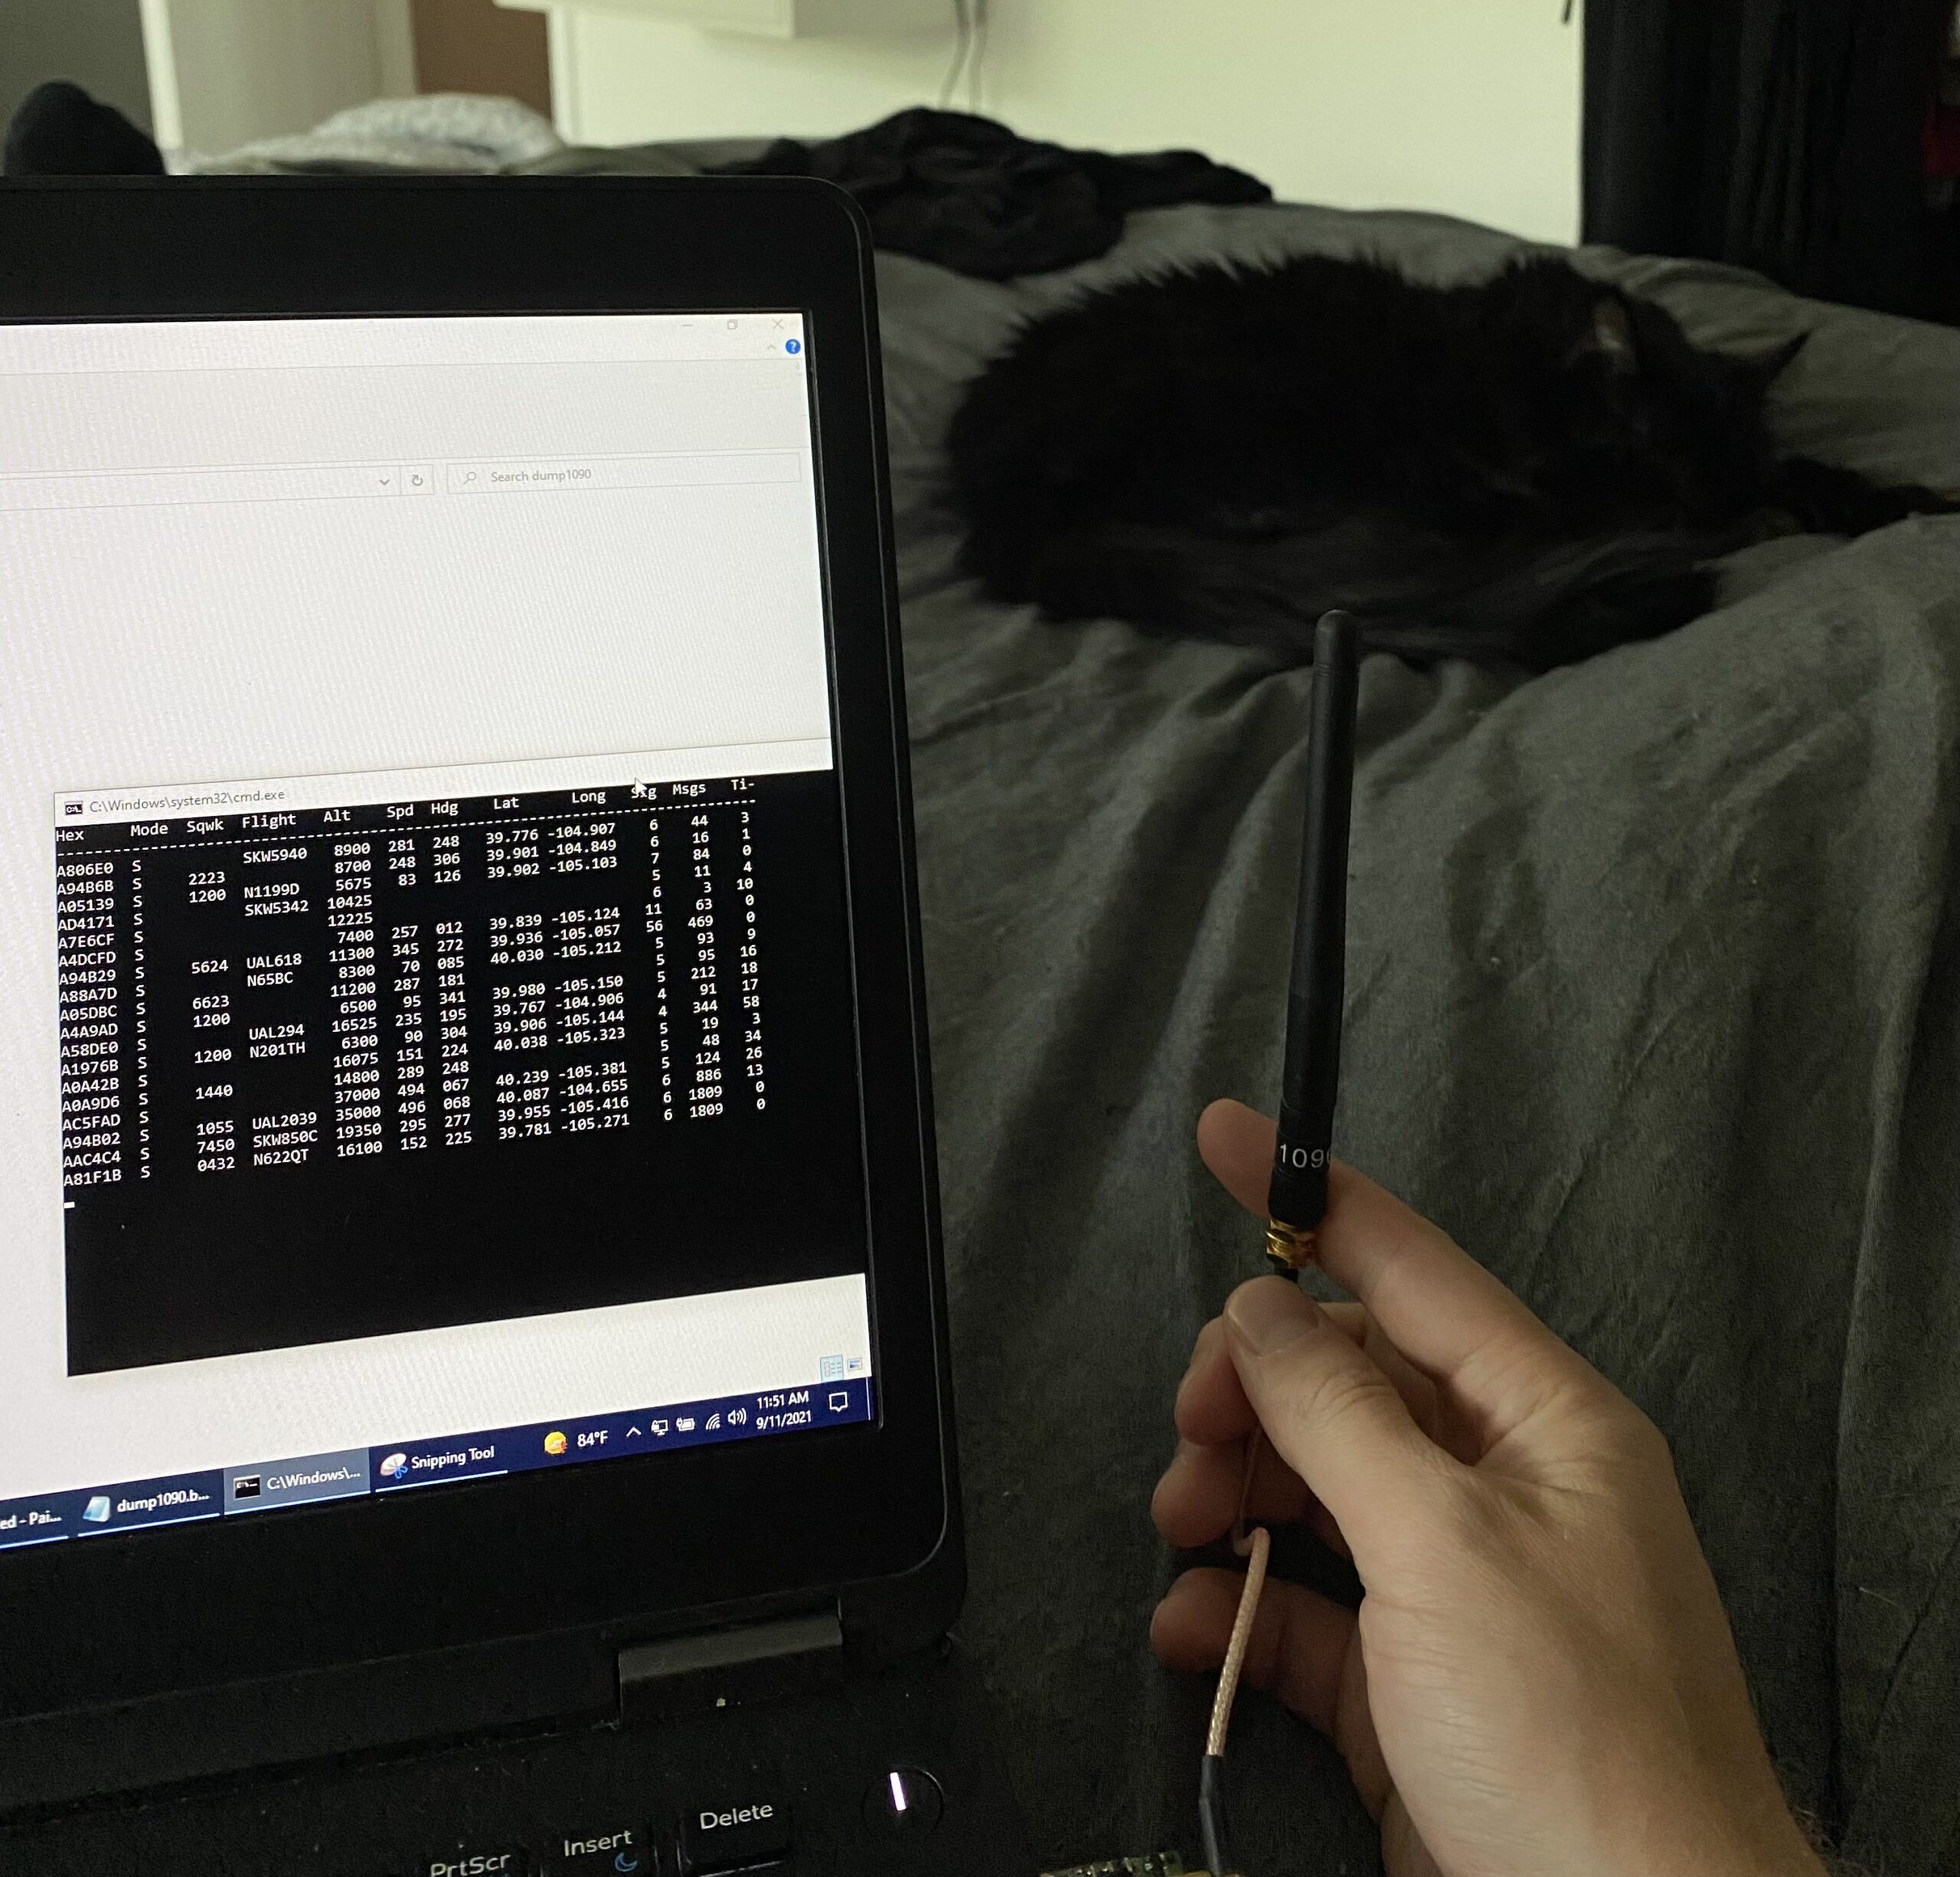
You will be presented with a screen that updates in realtime as signals come in. You are now receiving ADS-B signals with the same device that could listen to FM radio, and also temperature/humidity sensors around the house!
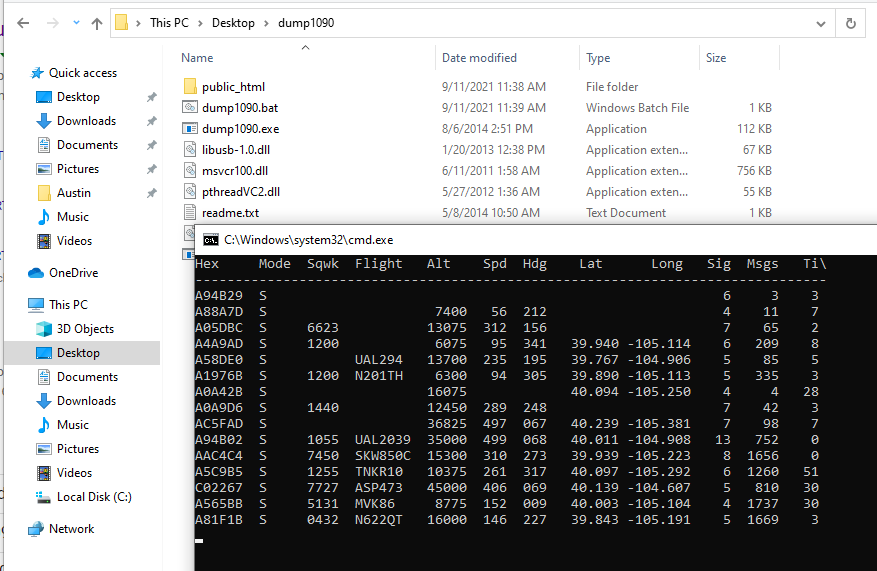
All this from a 1090 MHz antenna (which is actually finally the right frequency for the application at hand). Fluffy is still supervising:
Conclusion
In this SDR tutorial, we have purchased a RTL-SDR, installed the drivers, plugged it in, listened to FM radio, checked for wireless temperature/humidity sensors and found 3, and listened for aircraft ADS-B signals (and found 15 aircraft broadcasting in the last screenshot). This is an addictive hobby. With the right antenna, you can hear people speaking and morse code coding from across the world. In my next post I’ll show how to implement some of these into automated programs to take the data and input it into Home Assistant and other databases.
One last thing – receiving RF signals is 98% about the antenna and 2% about what you’re receiving the signals with! The base antennas that come with RTL-SDRs are good for the basics but if you really want to get into receiving interesting/distant signals, be prepared to spend 2-3x the cost of a SDR on a single antenna.
Hope you learned something and enjoyed this tutorial!
Disclosure: When you click on links to various merchants in this post and make a purchase, this can result in this site earning a commission. Affiliate programs and affiliations include, but are not limited to, the eBay Partner Network.