
Introduction
Today’s post will take us in a slightly different direction than the last few. Today’s post will be about hooking up some Python code to the X-Plane flight simulator to enable development of an autopilot using PID (proportional-integral-derivative) controllers. I’ve been a fan of flight simulators for quite some time (I distinctly remember getting Microsoft Flight Simulator 98 for my birthday when I was like 8 or 9) but have only recently started working with interfacing them to code. X-Plane is a well-known flight simulator developed by another Austin – Austin Meyer. It is regarded as having one of the best flight models and has tons of options for getting data into/out of the simulator. More than one FAA-certified simulator setups are running X-Plane as the primary driver software.
I got started thinking about writing some code for X-Plane while playing another game, Factorio. I drive a little plane or car in the game to get around my base and I just added a plug-in that “snaps” the vehicle to a heading, which makes it easier to go in straight lines. I thought – “hmm how hard could this be to duplicate in a flight sim?”. So here we are.
This post will get X-Plane hooked up to Python. The real programming will start with the next post.
2nd most recent post (added 2024-03-24) – Adding some polish to the X-Plane Python Autopilot with Flask, Redis, and WebSockets
Most recent post – Adding track following (Direct To) with cross track error to the Python X-Plane Autopilot
Video Link
Contents
- Download and install X-Plane (I used X-Plane 10 because it uses less resources than X-Plane 11 and we don’t need the graphics/scenery to look super pretty to do coding. It also loads faster.)
- Download and install NASA’s XPlaneConnect X-Plane plug-in to X-Plane
- Verify the XPlaneConnect plug-in is active in X-Plane
- Download sample code from XPlaneConnect’s GitHub page
- Run the sample script to verify data is being transmitted from X-Plane via UDP to the XPlaneConnect code
1 – Download and install X-Plane 10 or X-Plane 11
I’ll leave this one up to you. X-Plane 10 is hard to find these days I just discovered. X-Plane 11 is available on Steam for $59.99 as of writing. I just tested and the plug-in/code works fine on X-Plane 11 (but the flight models are definitely different and will need different PID values). My screenshots might jump between the two versions but the content/message will be the same.
2 – Download and install NASA’s XPlaneConnect plug-in
NASA (yes, that NASA, the National Aeronautics and Space Administration) has wrote a bunch of code to interface with X-Plane. They have adapters for C, C++, Java, Matlab, and Python. They work with X-Plane 9, 10, and 11.
- Download the latest version from the XPlaneConnect GitHub releases page, 1.3 RC6 as of writing
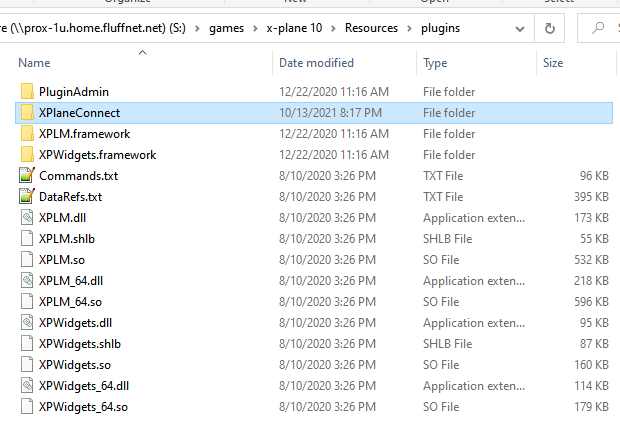
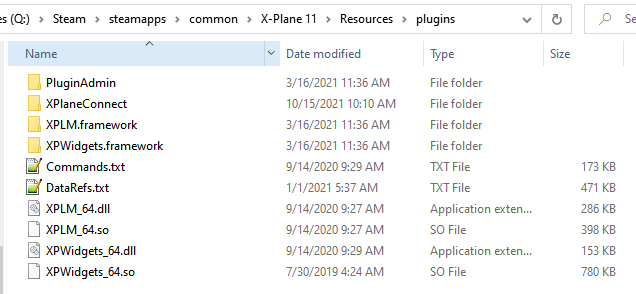
- Open the .zip and place the contents in the [X-Plane directory]/Resources/plugins folder. There are few other folders already present in this directory. Mine looked like this after adding the XPlaneConnect folder:
3 – Verify XPlaneConnect is active in X-Plane
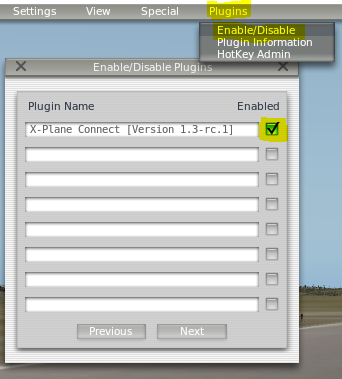
Now we’ll load up X-Plane and check the plug-ins to verify XPlaneConnect is enabled. Go to the top menu and select Plugins -> Plugin Admin. You should see X-Plane Connect checked in the enabled column:

4 – Download sample code from XPlaneConnect’s GitHub page
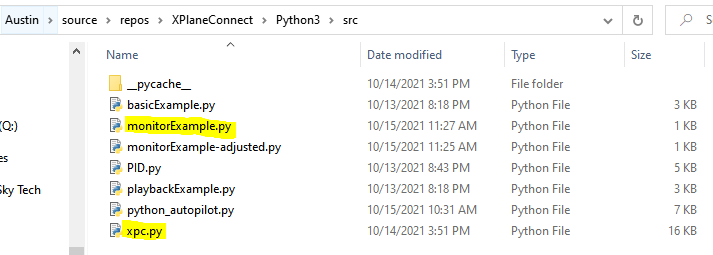
From the Python3 portion of the GitHub code, download xpc.py and monitorExample.py and stick them in your working directory (doesn’t matter where). For me, I just downloaded the entire git structure so the code is at C:\Users\Austin\source\repos\XPlaneConnect\Python3\src:
5 – Run sample code to verify data is making it from X-Plane to our code
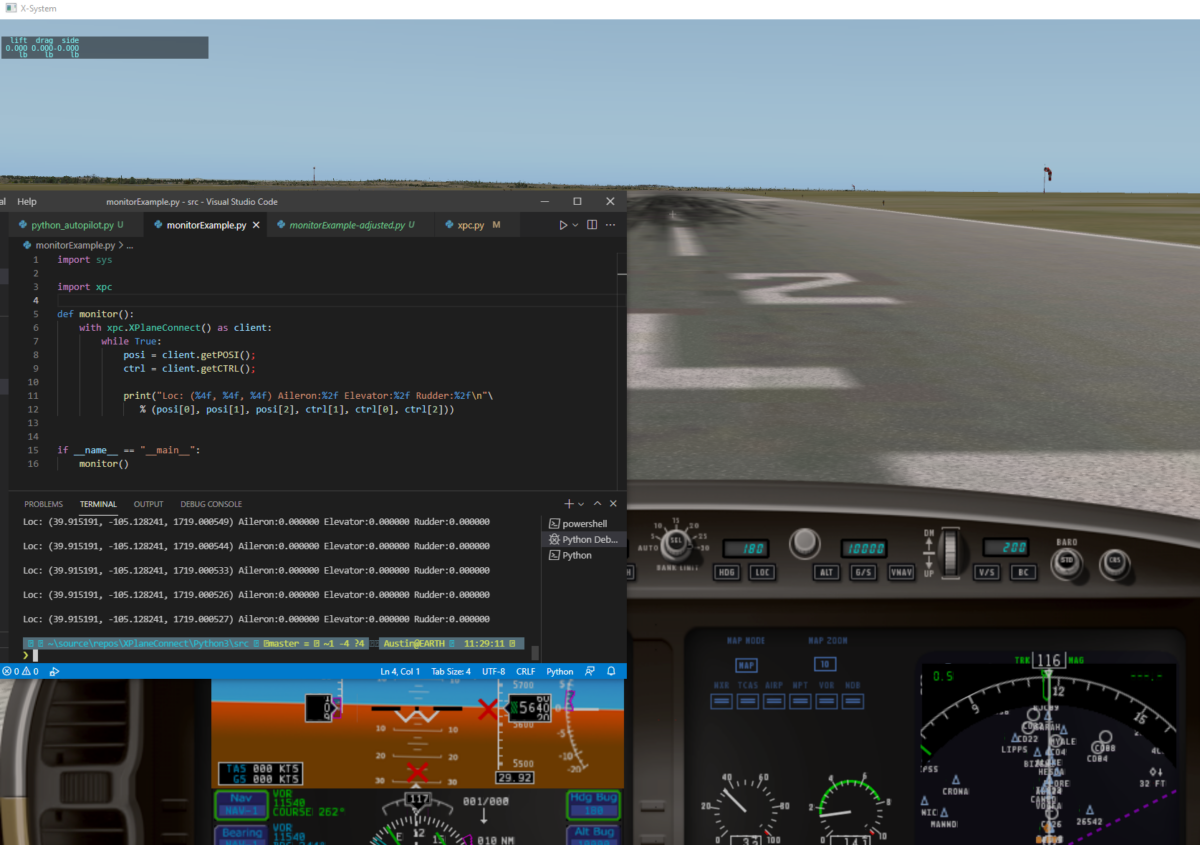
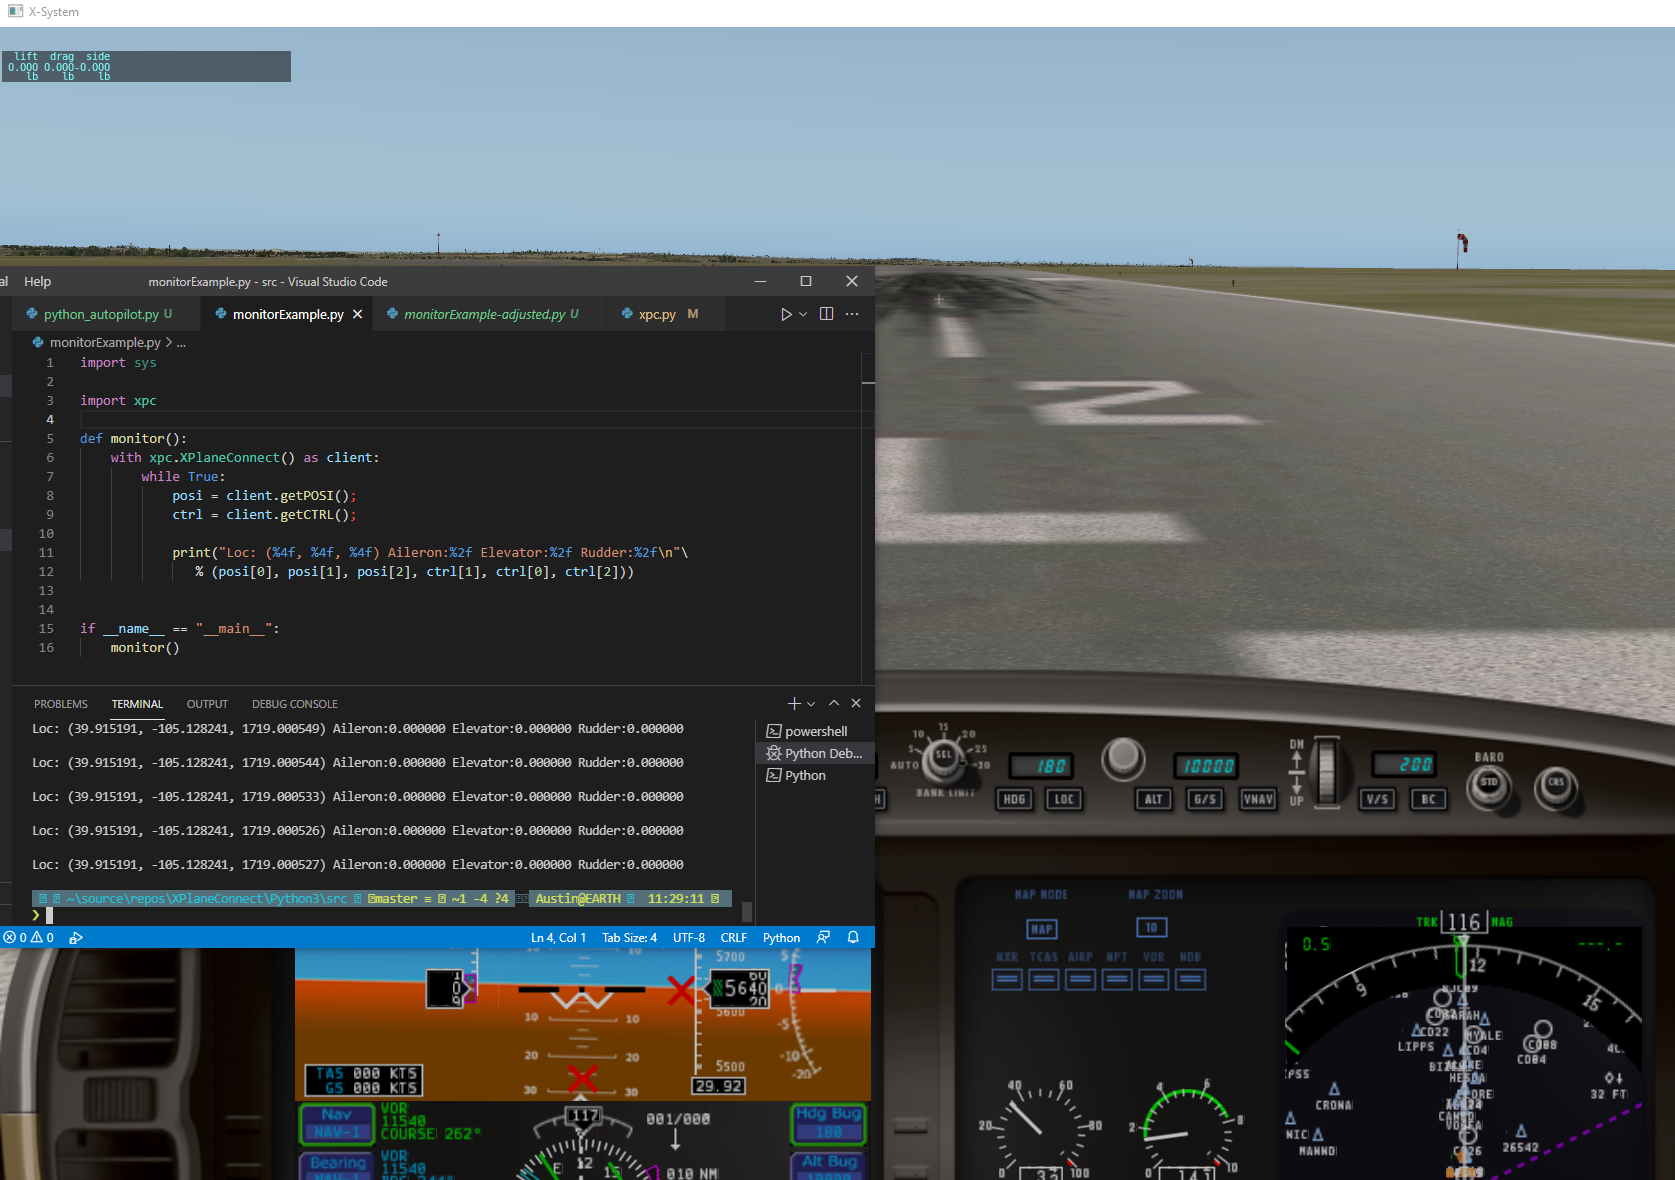
With X-Plane running with a plane on a runway (or anywhere really), go ahead and run monitorExample.py! I will be using Visual Studio Code to program this XPlane Python autopilot stuff so that’s where I’ll run it from.
You will start seeing lines scroll by very fast with 6 pieces of information – latitude, longitude, elevation (in meters), and the control deflections for aileron, elevator, and rudder (normalized from -1 to 1, with 0 being centered). In the below screenshot, we see a lat/lon of 39.915, -105.128, with an elevation of 1719m. First one to tell me in the comments what runway that is wins internet points!
Conclusion
In this post, we have successfully downloaded the XPlaneConnect plug-in, and demonstrated that it can successfully interface with Python code in both X-Plane 10 and X-Plane 11.
Next up is to start controlling the plane with a basic wing leveler. As of writing this post, I have the following completely functional:
- Pitch / roll hold at reasonable angles (-25 to 25)
- Altitude set and hold
- Heading set and hold
- Airspeed set and hold
- Navigate directly to a lat/lon point
See you at the next post! Next post – Coding a wing leveler autopilot in X-Plane with Python
6 replies on “Creating an autopilot in X-Plane using Python – part 1”
Hi, how to control true heading and go to a point (lat,lon) and a co-ordinated turn. Thanks!
That’s for you to determine! It is a complicated algorithm.
[…] revisited my Python X-Plane autopilot a few weeks ago because it was pretty clunky for how to adjust setpoints and such. The job I […]
That’s the Rocky Mountain Metropolitan Airport!
Please advise on how to redeem my 350 internet points.
Could you create a X-plane flight sim using YOLO/Soro AI? Honeybees can be modeled using YOLO. MAFDA AI is used for fruit fly behavior. They are written using python. Could AI model pilot behavior?
I have been wondering this myself. Big fan of ChatGPT and other models (I’ve done SD + tons of LLMs locally). Lots to decide/architect/code to make it work I’d guess.