Like all other WordPress blogs, this one attracts a good number of spam comments. I get usually 5-10 per day, but yesterday there were like 30. Almost all of them contain Cyrillic characters:
Since I specify that all comments are held until approved, that means I need to either approve or trash or spam every comment.
Enter ChatGPT
I use ChatGPT (specifically GPT 4) for a number of minor coding tasks. I find it helpful. It is not perfect. That doesn’t mean it isn’t useful. I decided to have it ponder this issue. I work with Python a lot at work and it’s typically my scripting language of choice. My initial request is as follows:
write a python script to log into a wordpress site as an admin, get the top 5 comments, see if there are any Cyrillic characters in them, and if there are, delete said comment
It was understandably unhappy about potentially being asked to “hack” a WordPress site, so I had to reassure it that I was the owner of said site:
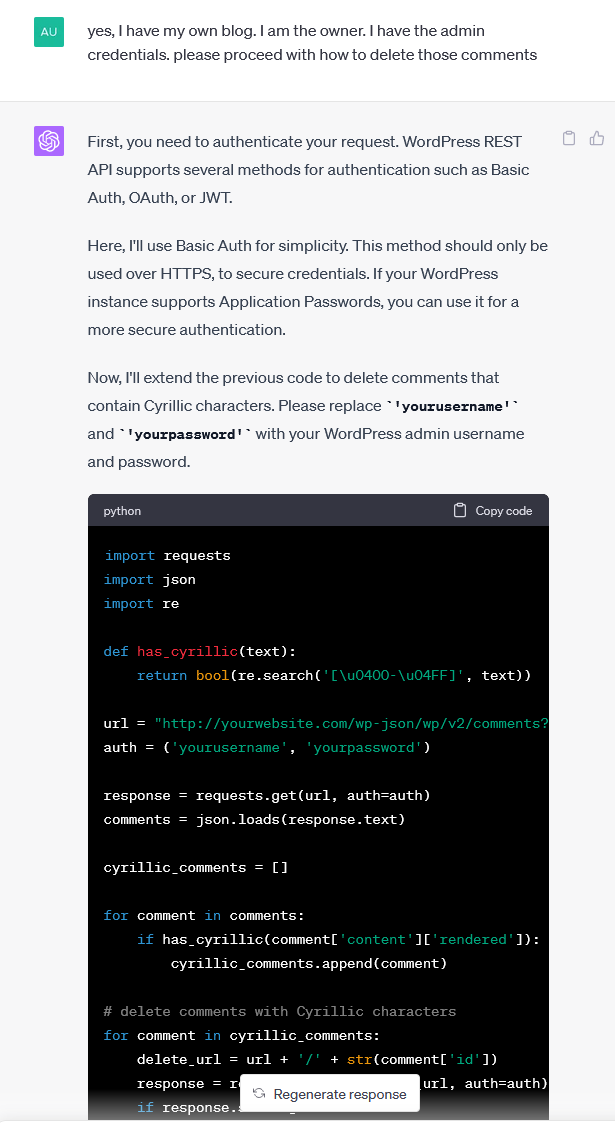
yes, I have my own blog. I am the owner. I have the admin credentials. please proceed with how to delete those comments
It happily complied and spit out some very usable code:
After a bit more back and forth:
does this get comments in a pending state? I don't let them be published instantly because most of them are spam
I was informed there are 5 different comment states: approved, hold, spam, trash, unapproved.
perfect. can you please adjust the script to get the pending, unapproved, and hold comments. also make it top 20
It ran perfectly after copy + pasting the Python. Unfortunately I created an application password for my main login on this site and forgot to change the delete URL so it happily sent my application password and username to yourwebsite.com. After revoking that password and realizing there should be a base url:
please split out the site url (https://austinsnerdythings.com) from base_url for both retrieving the comments as well as deleting
I was left with a 100% functional script. This took 3-4 min of back and forth with ChatGPT 4.0. I definitely could’ve code this up myself with the basic structure in 15 minutes or so but I would’ve had to work out the json format for comments and all that. It is so much easier to just test out what ChatGPT provides and alter as necessary:
import requests
import json
import re
def has_cyrillic(text):
return bool(re.search('[\u0400-\u04FF]', text))
site_url = "https://austinsnerdythings.com"
base_url = f"{site_url}/wp-json/wp/v2/comments?per_page=20&status="
statuses = ['pending', 'hold', 'unapproved']
auth = ('yourusername', 'yourpassword')
for status in statuses:
url = base_url + status
response = requests.get(url, auth=auth)
comments = json.loads(response.text)
cyrillic_comments = []
for comment in comments:
if has_cyrillic(comment['content']['rendered']):
cyrillic_comments.append(comment)
# delete comments with Cyrillic characters
for comment in cyrillic_comments:
delete_url = f"{site_url}/wp-json/wp/v2/comments/" + str(comment['id'])
response = requests.delete(delete_url, auth=auth)
if response.status_code == 200:
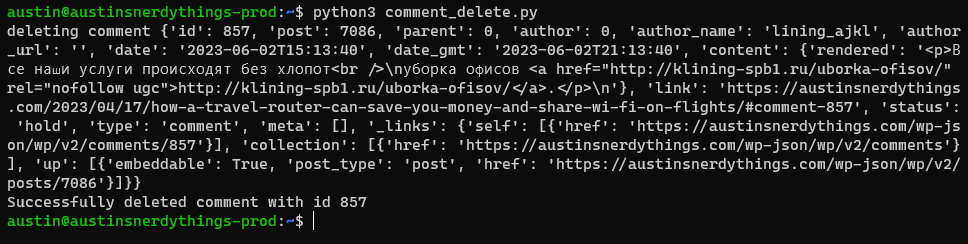
print(f"Successfully deleted comment with id {comment['id']}")
else:
print(f"Failed to delete comment with id {comment['id']}. Response code: {response.status_code}")
Finishing touches
The other finishing touches I did were as follows:
Created a user specific for comment moderation. I used the ‘Members’ plugin to create a very limited role (only permissions granted are the necessary ones: Moderate Comments, Read, Edit Posts, Edit Others’ Posts, Edit Published Posts) and assigned said user to it. This greatly limits the potential for abuse if the account password falls into the wrong hands.
Copied the script to the web host running the blog
Set it to be executed hourly via crontab
Now I have a fully automated script that deletes any blog comments with any Cyrillic characters!
You may be asking yourself why I don’t use Akismet or Recaptcha or anything like that. I found the speed tradeoff to not be worthwhile. They definitely slowed down my site for minimal benefit. It only took a couple minutes a day to delete the spam comments. But now it takes no time because it’s automated!
screenshot of UI showing AI-generated cat using stable diffusion 1.5 via automatic1111/stable-diffusion-webui with default settings
Like most other internet-connected people, I have seen the increase in AI-generated content in recent months. ChatGPT is fun to use and I’m sure there are plenty of useful use cases for it but I’m not sure I have the imagination required to use it to it’s full potential. The AI art fad of a couple months ago was cool too. In the back of my mind, I kept thinking “where will AI take us in the next couple years”. I still don’t know the answer to that. The only “art” I am good at is pottery (thanks to high-school pottery class – I took 4 semesters of it and had a great time doing so, whole different story). But now I’m able to generate my own AI art thanks to a guide I found the other day on /g/. I am re-writing it here with screenshots and a bit more detail to try and make it more accessible to general users.
NOTE: You need a decent/recent Nvidia GPU to follow this guide. I have a RTX 2080 Super with 8GB of VRAM. There are low-memory workarounds but I haven’t tested them yet. An absolute limit is 2GB VRAM, and a GTX 7xx (Maxwell architecture) or newer GPU.
Stable Diffusion Tutorial Contents
Installing Python 3.10
Installing Git (the source control system)
Clone the Automatic1111 web UI (this is the front-end for using the various models)
Download models
Adjust memory limits & enable listening outside of localhost
First run
Launching the web UI
Generating Stable Diffusion images
Video version of this install guide
Coming soon. I always do the written guide first, then record based off the written guide. Hopefully by end of day (mountain time) Feb 24.
1 – Installing Python 3.10
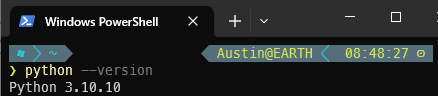
This is relatively straight-forward. To check your Python version, go to a command line and enter
python --version
If you already have Python 3.10.x installed (as seen in the screenshot below), you’re good to go (minor version doesn’t matter).
Python 3.10 installed for Stable Diffusion
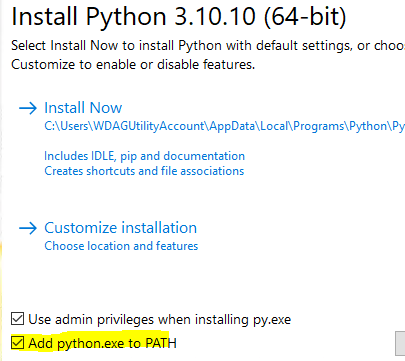
If not, go to the Python 3 download page and select the most recent 3.10 version. As of writing, the most recent is 3.10.10. Download the x64 installer and install. Ensure the “add python.exe to PATH” checkbox is checked. Adding python.exe to PATH means it can be called with only python at a command prompt instead of the full path, which is something like c:/users/whatever/somedirectory/moredirectories/3.10.10/python.exe.
Installing python and adding python.exe to PATH
2 – Installing Git (the source control system)
This is easier than Python – just install it – https://git-scm.com/downloads. Check for presence and version with git –version:
git installed and ready to go for Stable Diffusion
3 – Clone the Automatic1111 web UI (this is the front-end for using the various models)
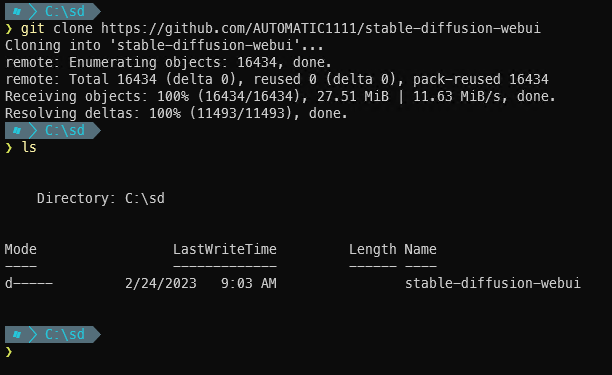
With Git, clone means to download a copy of the code repository. When you clone a repo, a new directory is created in whatever directory the command is run in. Meaning that if you navigate to your desktop, and run git clone xyz, you will have a new folder on your desktop named xyz with the contents of the repository. To keep things simple, I am going to create a folder for all my Stable Diffusion stuff in the C:/ root named sd and then clone into that folder.
After the git clone completes, there will be a new directory called ‘stable-diffusion-webui’:
stable-diffusion-webui cloned and ready to download models
4 – Download models
“Models” are what actually generate the content based on provided prompts. Generally, you will want to use pre-trained models. Luckily, there are many ready to use. Training your own model is far beyond the scope of this basic installation tutorial. Training your own models generally also requires huge amounts of time crunching numbers on very powerful GPUs.
As of writing, Stable Diffusion 1.5 (SD 1.5) is the recommended model. It can be downloaded (note: this is a 7.5GB file) from huggingface here.
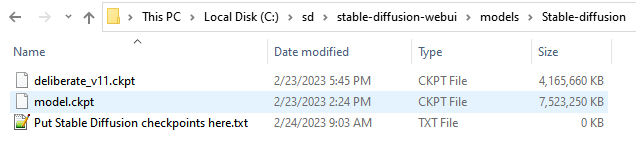
Take the downloaded file, and place it in the stable-diffusion-webui/models/Stable-diffusion directory and rename it to model.ckpt (it can be named anything you want but the web UI automatically attempts to load a model named ‘model.ckpt’ upon start). If you’re following along with the same directory structure as me, this file will end up at C:\sd\stable-diffusion-webui\models\Stable-diffusion\model.ckpt.
Another popular model is Deliberate. It can be downloaded (4.2GB) here. Put it in the same folder as the other model. No need to rename the 2nd (and other) models.
After downloading both models, the directory should look like this:
Stable Diffusion 1.5 (SD 1.5) and Deliberate_v11 models ready for use
5 – Adjust memory limits & enable listening outside of localhost (command line arguments)
Inside the main stable-diffusion-webui directory live a number of launcher files and helper files. Find webui-user.bat and edit it (.bat files can be right-clicked -> edit).
Add –medvram (two dashes) after the equals sign of COMMANDLINE_ARGS. If you also want the UI to listen on all IP addresses instead of just localhost (don’t do this unless you know what that means), also add –listen.
webui-user.bat after edits
@echo off

set PYTHON=
set GIT=
set VENV_DIR=
set COMMANDLINE_ARGS=--listen --medvram

call webui.bat
6 – First run
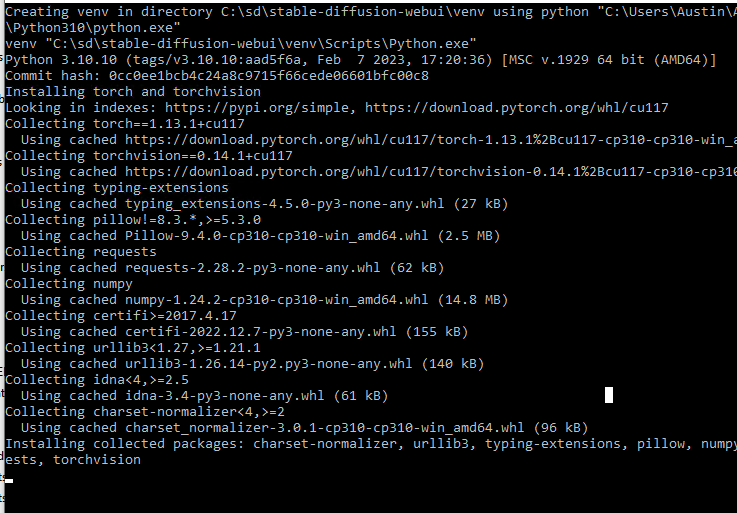
The UI tool (developed by automatic1111) will automatically download a variety of requirements upon first launch. It will take a few minutes to complete. Double-click the webui-user.bat file we just edited. It calls a few .bat files and eventually launches a Python file. The .bat files are essentially glue to stick a bunch of stuff together for the main file.
The very first thing it does is creates a Python venv (virtual environment) to keep the Stable Diffusion packages separate from your other Python packages. Then it pip installs a bunch of packages related to cuda/pytorch/numpy/etc so Python can interact with your GPU.
webui-user.bat using pip to install necessary python packages like cuda
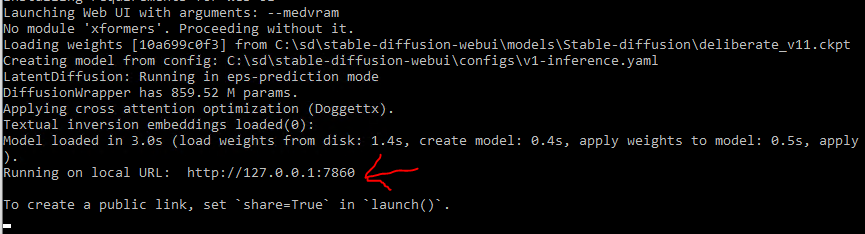
After everything is installed and ready to go, you will see a line that says: Running on local URL: http://127.0.0.1:7860. That means the Python web server UI is running on your own computer on port 7860 (if you added –listen to the launch args, it will show 0.0.0.0:7860, which means it is listening on all IP addresses and can be accessed by external machinse).
stable-diffusion-webui launched and ready to load
7 – Launching the web UI
With the web UI server running, it can be accessed via browser on the same computer running the Python at http://127.0.0.1:7860. That link should work for you if you click it.
Note that if the Python process closes for whatever reason (you close the command window, your computer reboots, etc), you need to double-click webui-user.bat to relaunch it and it needs to be running any time you want to access the web UI.
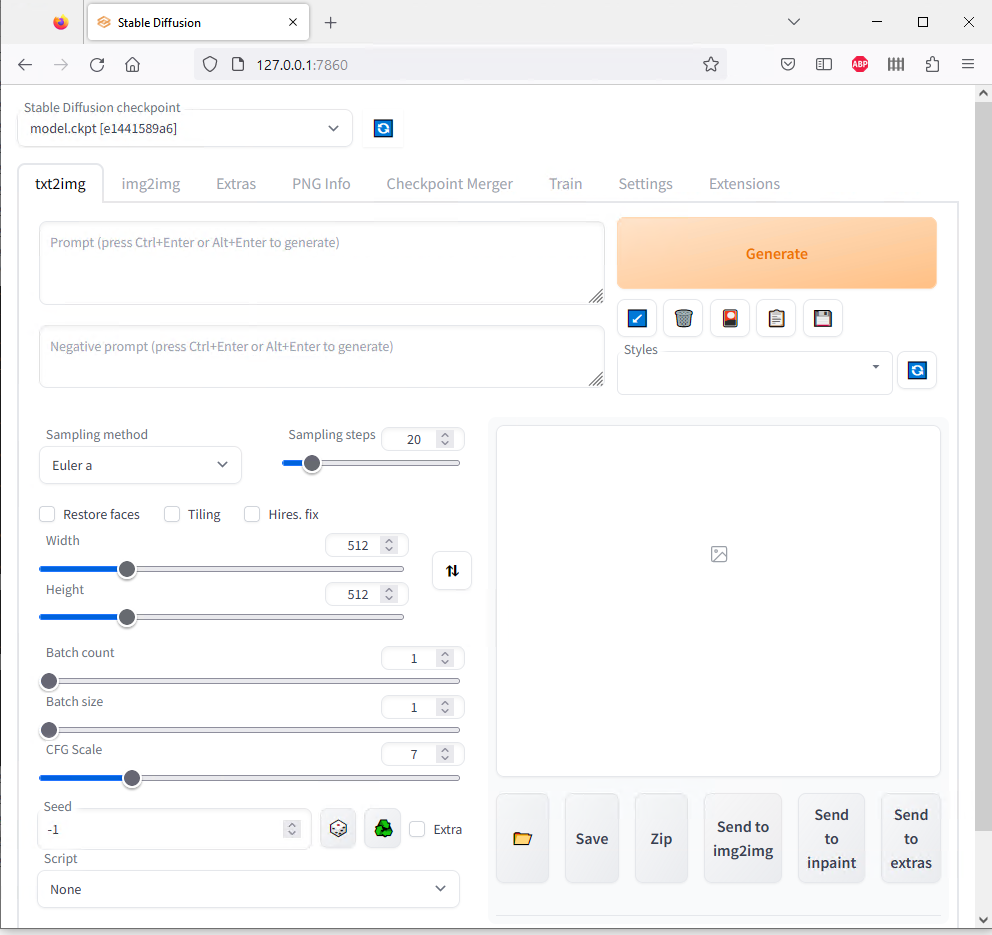
Automatic1111 stable diffusion web UI up and running
As seen in the screenshot, there are a ton of parameters/settings. I’ll highlight a few in the next section
8 – Generating Stable Diffusion images
This is the tricky part. The prompts make or break your generation. I am still learning. The prompt is where you enter what you want to see. Negative prompt is where you enter what you don’t want to see.
Let’s start simple, with cat in the prompt. Then click generate. A very reasonable-looking cat should soon appear (typically takes a couple seconds per image):
AI-generated cat with stable diffusion 1.5 with default settings
To highlight a few of the settings/sliders:
Stable diffusion checkpoint – model selector. Note that it’ll take a bit to load a new model (the multi-GB files need to be read in their entirety and ingested).
Prompt – what you want to see
Negative prompt – what you don’t want to see
Sampling method – various methods to sample new points
Sampling steps – how many iterations to use for image generation for a single image
Width – width of image to generate (in pixels). NOTE, you need a very powerful GPU with a ton of VRAM to go much higher than the default 512
Height – height of image to generate (in pixels). Same warning applies as width
Batch count – how many images to include in a batch generation
Batch size – haven’t used yet, presumably used to specify how many batches to generate
CFG Scale – this slider tells the models how specific they need to be for the prompt. Higher is more specific. Really high values (>12ish) start to get a bit abstract. Probably want to be in the range of 3-10 for this slider.
Seed – random number generator seed. -1 means use a new seed for every image.
Some thoughts on prompt/negative prompt
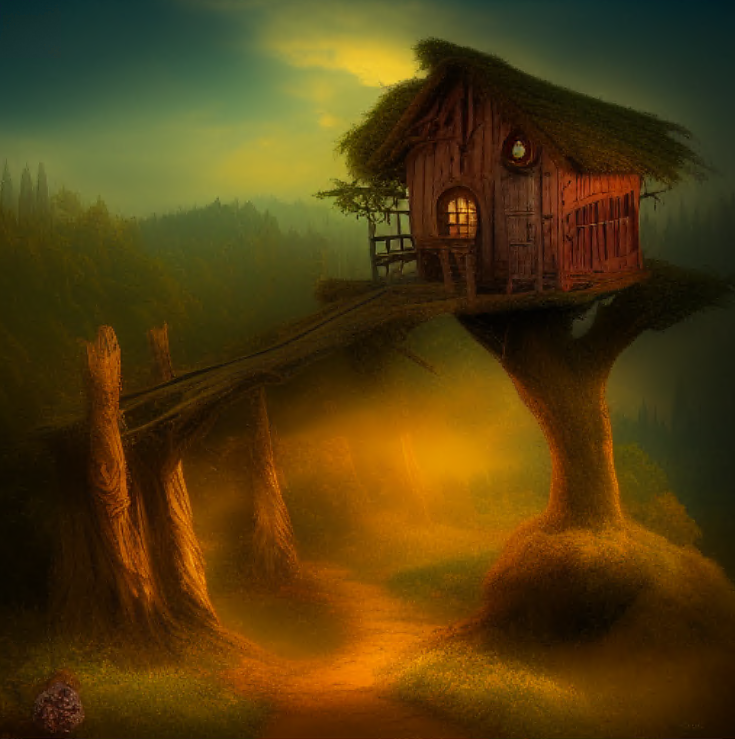
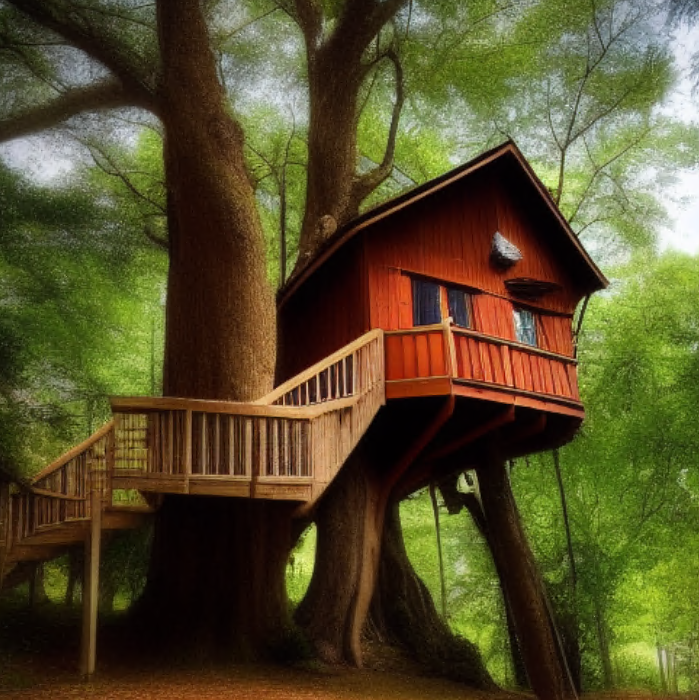
From my ~24 hours using this tool, it is very clear that prompt/negative prompts are what make or break your generation. I think that your ability as a pre-AI artist would come in handy here. I am no artist so I have a hard time putting what I want to see into words. Take example prompt: valley, fairytale treehouse village covered, matte painting, highly detailed, dynamic lighting, cinematic, realism, realistic, photo real, sunset, detailed, high contrast, denoised, centered. I would’ve said “fairytale treehouse” and stopped at that. Compare the two prompts below with the more detailed prompt directly below and the basic “fairytale treehouse” prompt after that:
AI-generated “fairytale treehouse” via stable diffusion. Prompt: valley, fairytale treehouse village covered, matte painting, highly detailed, dynamic lighting, cinematic, realism, realistic, photo real, sunset, detailed, high contrast, denoised, centeredAI-generated “fairytale treehouse” via stable diffusion. Prompt: fairytale treehouse
One of these looks perfectly in place for a fantasy story. The other you could very possibly see in person in a nearby forest.
Both positive and negative can get very long very quickly. Many of the AI-generated artifacts present over the last month or two can be eliminated with negative prompt entries.
I will not pretend to know what works well vs not. Google is your friend here. I believe that “prompt engineering” will be very important in AI’s future. Google is your friend here.
Conclusion
AI-generated content is here. It will not be going away. Even if it is outlawed, the code is out there. AI will be a huge part of our future, regardless of if you want it or not. As the saying goes – pandora’s box is now open.
I figured it was worth trying. The guide this is based off made it relatively easy for me (but I do have above-average computer skill), and I wanted to make it even easier. Hopefully you found this ‘how to set up stable diffusion’ guide easy to use as well. Please let me know in the comments section if you have any questions/comments/feedback – I check at least daily!
Resources
Huge shout out to whoever wrote the guide (“all anons”) at https://rentry.org/voldy. That is essentially where this entire guide came from.
Disclosure: When you click on links to various merchants in this post and make a purchase, this can result in this site earning a commission. Affiliate programs and affiliations include, but are not limited to, the eBay Partner Network.