Today’s blog post is driven by a desire for simplicity. If you would’ve asked me even a month ago – “Hey Austin, do you think hooking GitHub actions up to deploy a docker-compose application stack is a good way to simplify something?” I 1000% would’ve said no. But I have had to get comfortable with Docker for work over the last couple months. That, combined with some assistance from my favorite AI (GPT4), has led to something I would call “simple”. The first attempt at anything is always a bit rough (one time I did get up on an “air chair” hydrofoil on my first attempt at Seminoe Reservoir in Wyoming though, and earned $100 on a bet for it) but this is a super repeatable pattern.
WARNING ABOUT SECURITY (written by me): This solution does not automatically make your app secure. You still need to have a laser-sharp focus on security. Any vulnerability in your web app can allow an attacker to gain a foothold in your network. Your docker host should be firewalled off from the rest of your network as a first step to prevent traversal into other computers/services/systems in your network. Any steps after that should be focused on the usual attack vectors (SQL injection, keeping systems up to date, etc).
WARNING ABOUT SECURITY (written by ChatGPT): Opening a tunnel directly into your home network can expose internal systems to external threats if not properly secured. Reddit commenters (see https://www.reddit.com/r/homelab/comments/17mc2jg/not_a_fan_of_opening_ports_in_your_firewall_to/) have pointed out that bypassing traditional port-forwarding and firewall configurations can lead to unauthorized access if the tunnel is not adequately protected. The use of Cloudflared or similar tunneling services can alleviate the need for port-forwarding, but without proper security measures, such as robust authentication and encryption, the tunnel could become a vector for malicious activity. It’s crucial to ensure that any tunnel into your (home) network is securely configured to mitigate potential security risks.
Cloudflare tunnels allow for CF to route traffic to your service without port-forwarding. That’s the key for how this all works.
Table of Contents
- Components of the stack
- Web framework, web server, cloudflare tunnel, GitHub & Actions, docker, docker host, etc
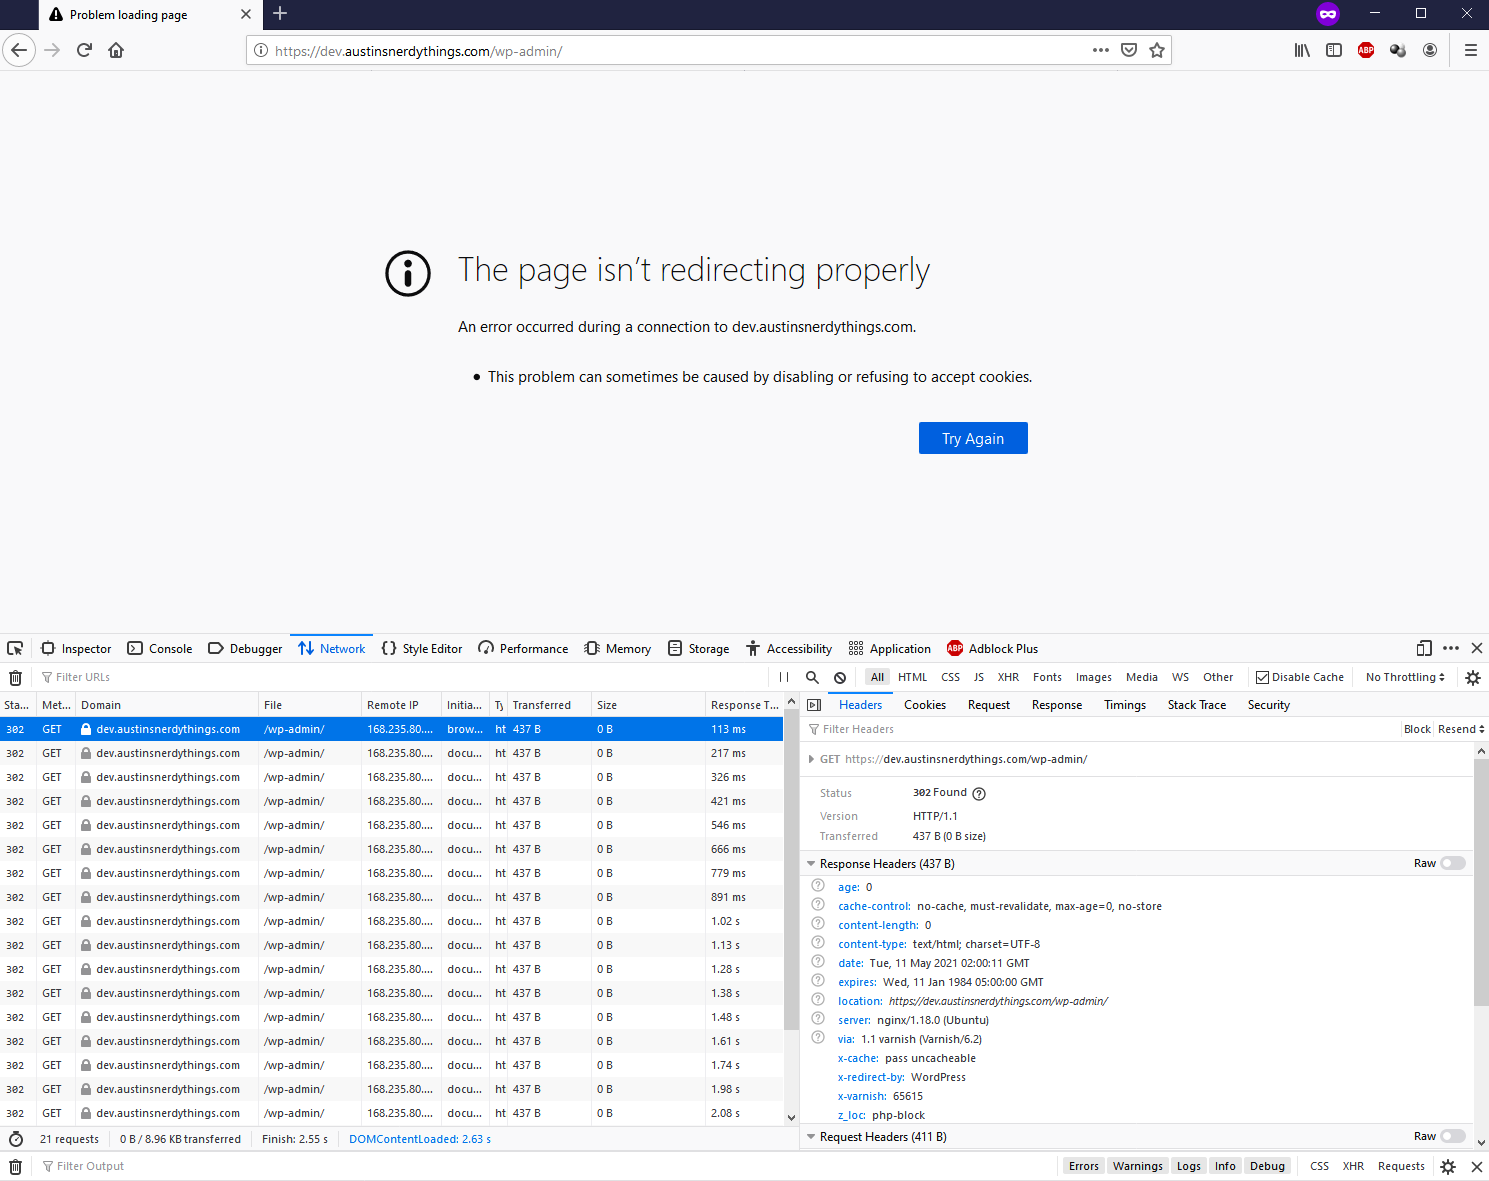
- Example website running this stack – uuid7.com (down as of 8:15am 2023-11-03 while I take my own security advice and migrate to it’s own network on my VM host. still getting DNS figured out the the tunnel can be established. back up as of 8:30am, had a block to all internal networks rule, needed to add a allow DNS to DMZ interface before it)
- Docker & Docker compose
- Self-hosted GitHub runner on a VM
- GitHub Actions
Components of the stack
There are quite a few parts of this stack. Also I am not a fan of the word/phrase “stack” for describing these kinds of things but here we are. It really is a stack.
- Flask – a basic web framework for getting stuff off the ground quickly. Substitute in any of your own frameworks here. As long as they can listen on a port, you’ll be fine. Django, ASP.NET Core, etc. would all work here.
- NGINX – not strictly necessary, but it’s the web server I’m most familiar with. It logs to a standard format, and works well. Some of the frameworks mentioned above do warn against deploying directly to the internet so we stick NGINX in front.
- Cloudflared (Cloudflare Tunnels) – these tunnels are super handy. They establish an outbound connection to Cloudflare from whatever they’re running on. Once the tunnel is established, anything destined for your service will go to Cloudflare first (since they are doing the DNS) and from there, it’ll get routed through the tunnel to your service.
- Docker – runs containers. Hopefully I don’t need to expand on this.
- Docker compose – runs multiple containers in a group. Allows for easy (well “easy” in the sense that each container can talk to each other relatively easily) networking, and ability to stand up a “stack” of related containers together.
- GitHub – hosts code. Also not expanding on this
- GitHub Actions – triggers actions when various criteria are hit for your repository hosted on GitHub (for example, pushing a new docker compose file when committed to main)
- A host running Docker (your desktop/laptop, Linux VM, AWS EC2 instance, etc.)- place for the docker stack to be deployed
- Self-hosted GitHub runner – place where the action is run when code is committed to main
Okay so now that I’ve wrote out that list, it is not exactly simple. But is is repeatable. Realistically, the only part you’ll change is Flask and the docker-compose.yml file. The rest are somewhat copy + paste.
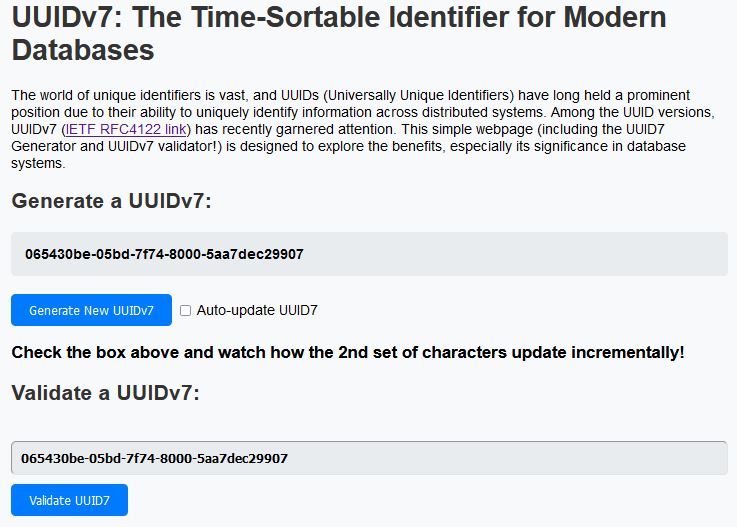
Example website running this stack – uuid7.com
Like quite a few of you reading this, I buy domains far before I actually do anything with them. I have a side project I’m working on (a “Tinder for Restaurants”), and decided on GUIDs/UUIDs as the IDs for all my tables. UUIDv4 turns out to not work well with database indexes because it is not sequential. UUIDv7 is and works great (it has a time component as well as some randomness). I wanted to make a simple site to demonstrate UUIDv7s hence uuid7.com was born about a month ago. Screenshot below:
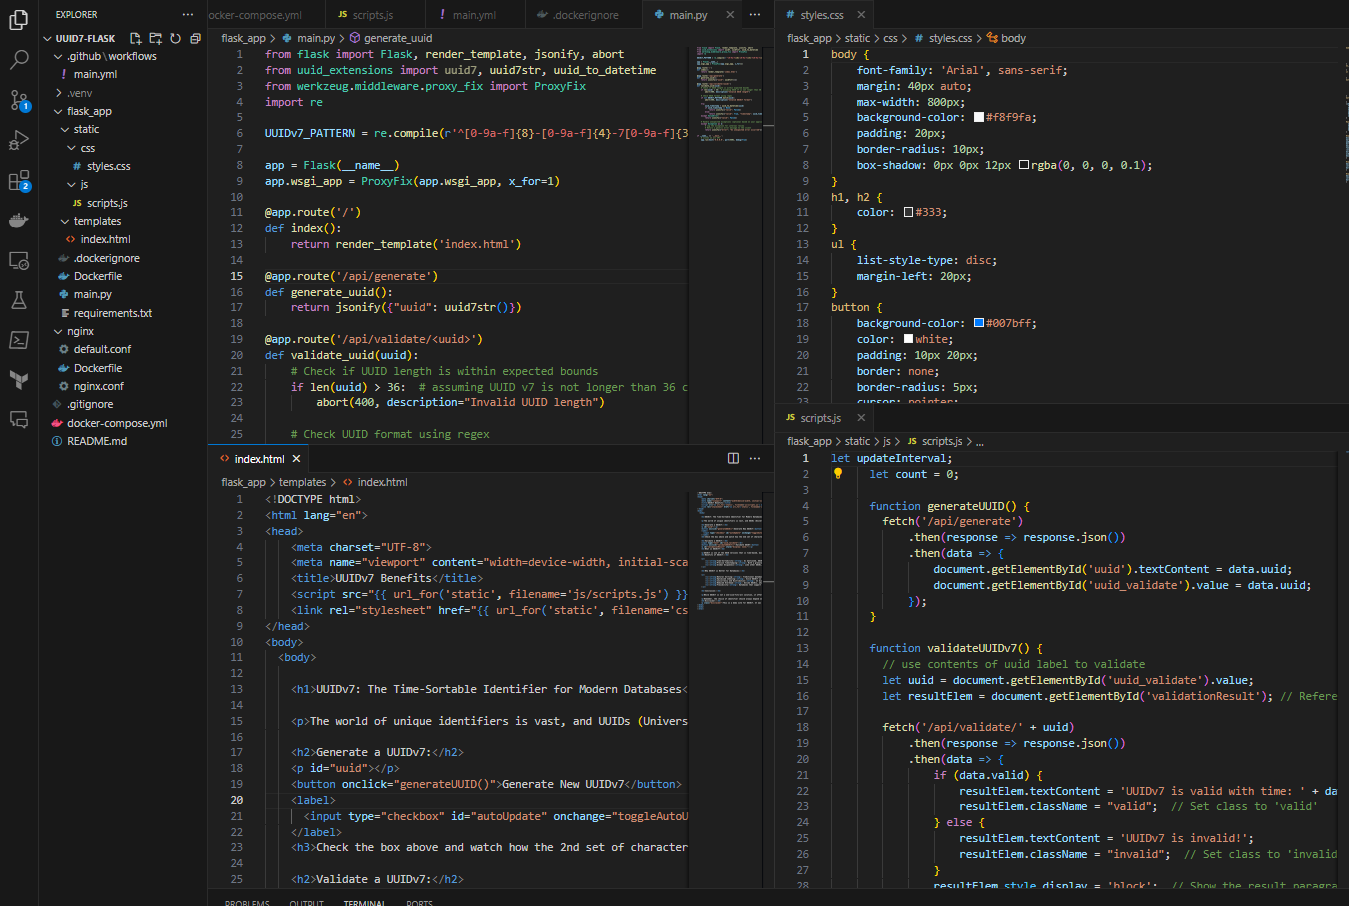
uuid7.com components
This is a pretty straight-forward site. There is a main.py which is the entry point for the Docker image, a styles.css, scripts.js, and an index.html template.
A typical set of NGINX log entries for a real person visiting the site with a real browser is such:

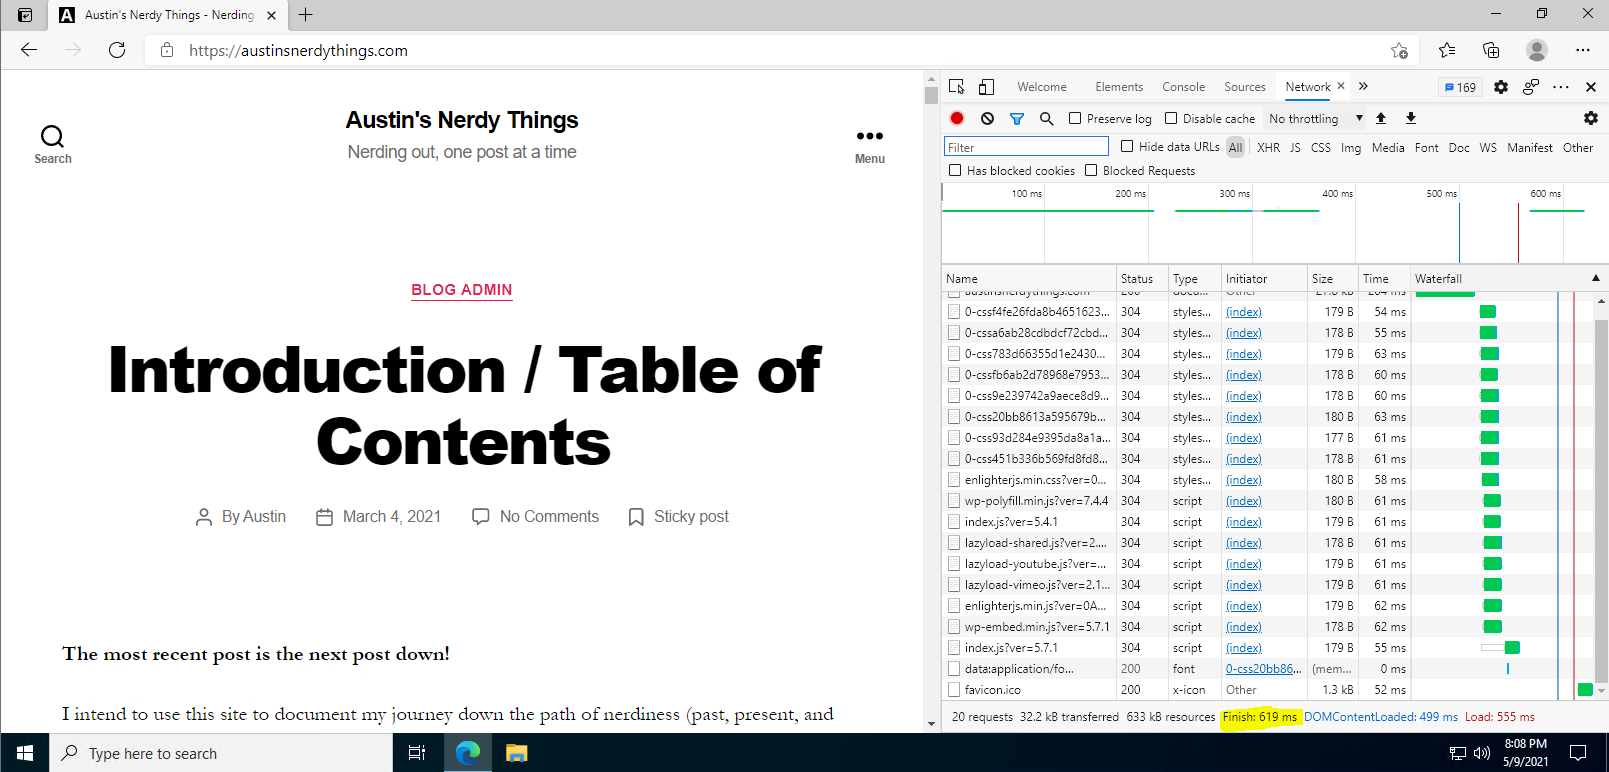
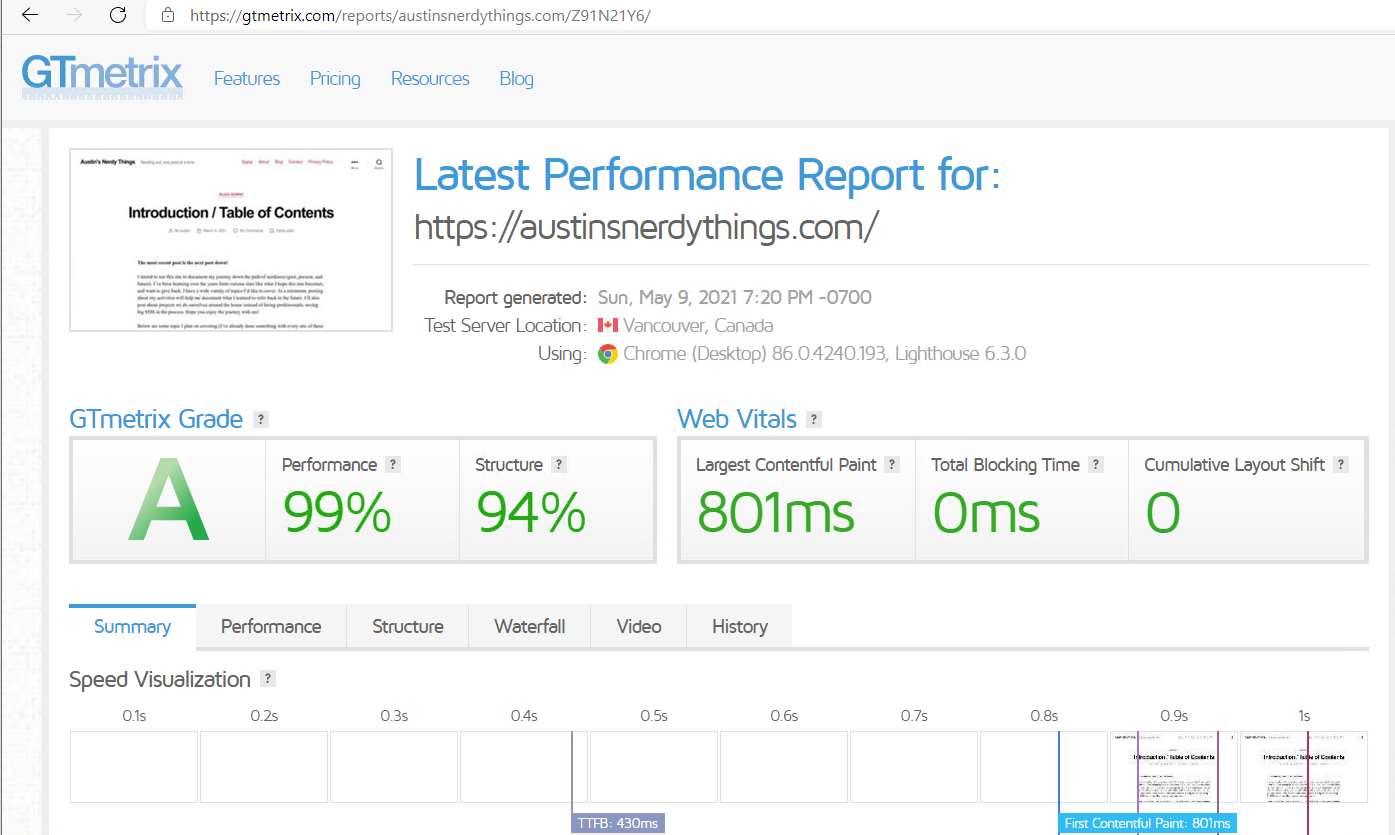
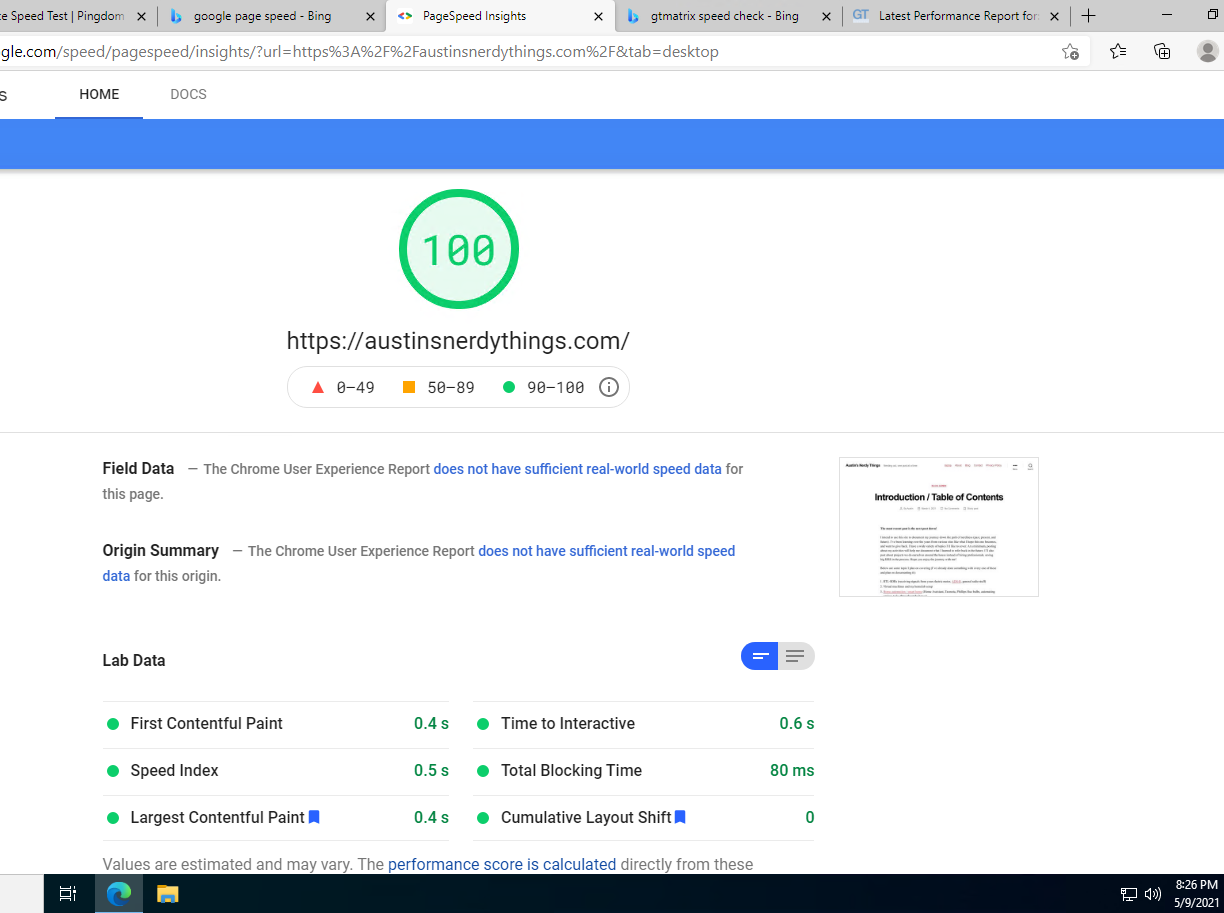
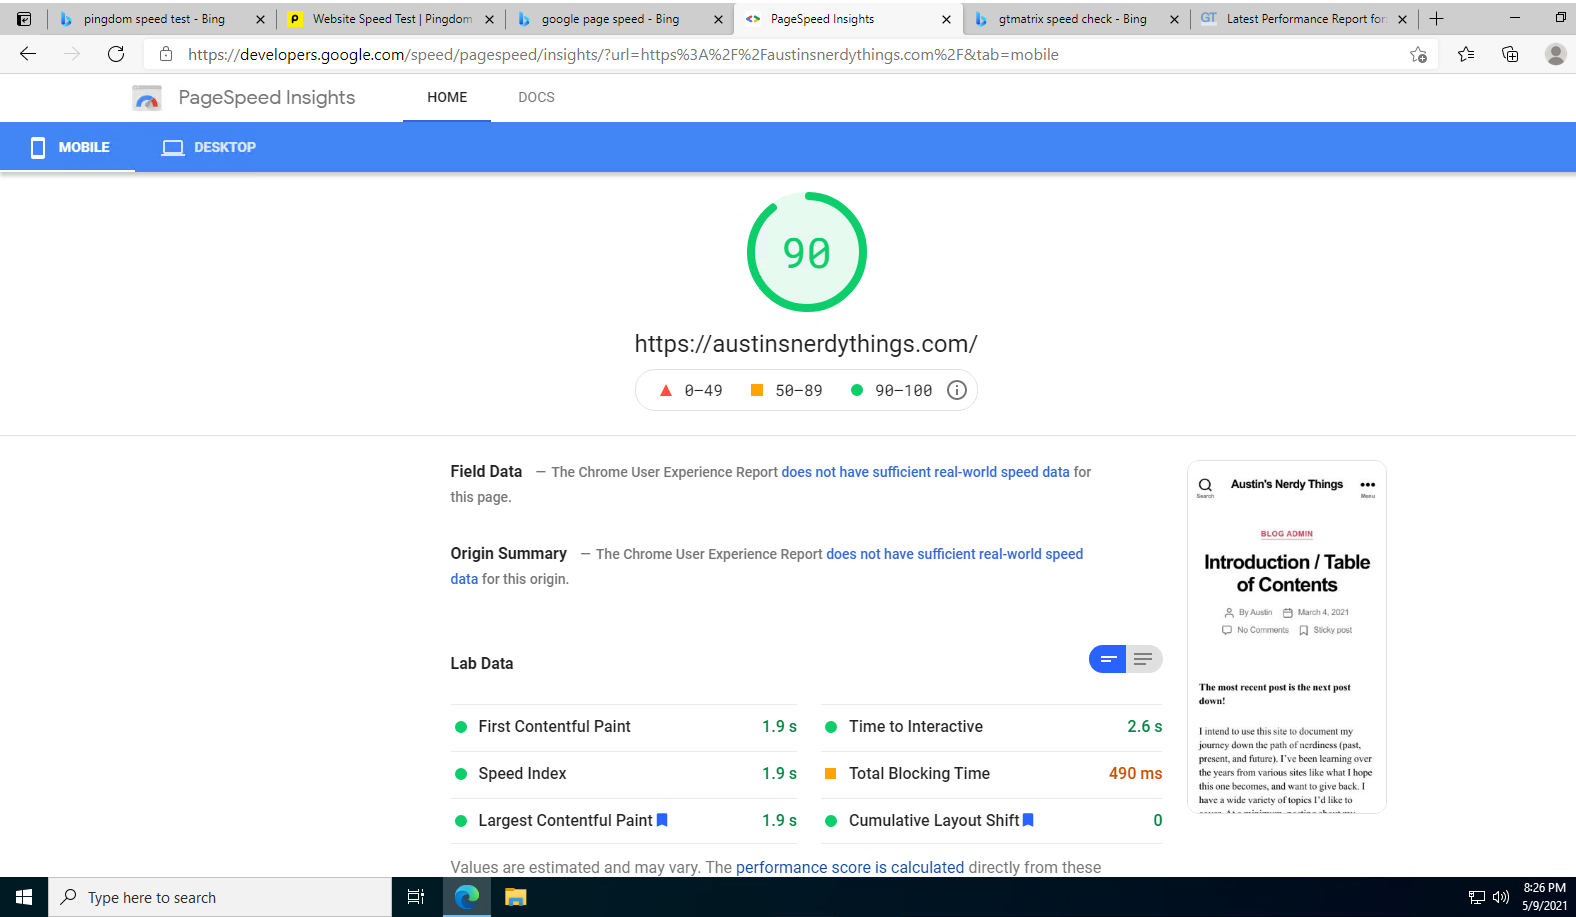
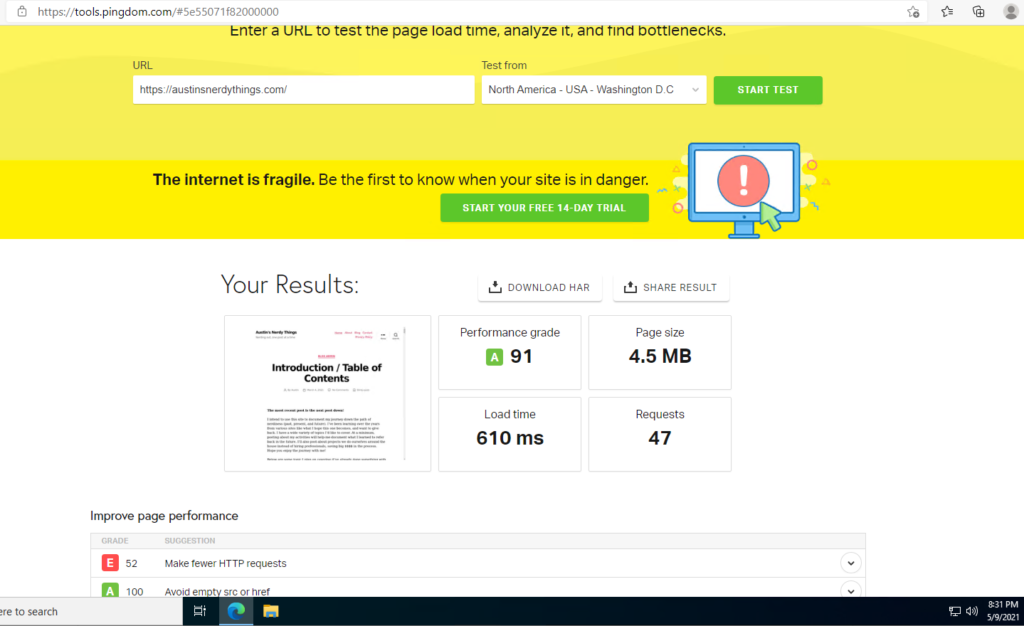
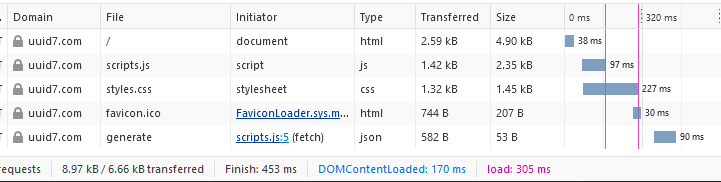
As you might expect, the site loads fairly quickly:
Docker & Compose
I’m not going to elaborate on how Docker works. The Dockerfile for the flask app is 7 lines (see below). We are getting the Python 3.11 base image, copying the code, installing flask and uuid7, exposing a port (which I don’t think is strictly necessary), defining an entry point and the file to run. Doesn’t get much easier than this.
FROM python:3.11
WORKDIR /app
COPY . .
RUN pip install flask uuid7
EXPOSE 5602
ENTRYPOINT [ "python" ]
CMD ["main.py"]
Do note that I am running Flask on port 5602:
if __name__ == '__main__':
    # listen on all IPs
    app.run(host='0.0.0.0', port=5602, debug=True)
Ah but you might say “Austin, I thought you also had Cloudflare Tunnels and NGINX going?”. And you would be right.
There is no NGINX “app” container, just two config files (a “default” NGINX-wide one called nginx.conf and a site-specific one called default.conf).
For the site specific config, we are just saying, listen on port 8755 for SSL requests, use the defined cert and key, and pass everything to the container named “flask” via port 5602. You are free to use whatever ports here you want. There are multiple (nginx listen port -> flask listen port). The IP/Forwarded headers are so NGINX can log the real requester and not the Cloudflare server that forwarded the request. If you do not do this step, it will look like all of your customers/clients are coming from cloudflare and you’ll never see their real IPs.
NGINX site-specific default.conf:
# default.conf
server {
    listen 8755 ssl;

    ssl_certificate /etc/nginx/ssl/cert.pem;
    ssl_certificate_key /etc/nginx/ssl/key.pem;

    location / {
        limit_req zone=basic_limit burst=16;
        proxy_pass http://flask:5602;
        proxy_set_header Host $host;
        proxy_set_header X-Real-IP $realip_remote_addr;
        proxy_set_header X-Forwarded-For $proxy_add_x_forwarded_for;
        proxy_set_header X-Forwarded-Proto $scheme;
    }
}
For the NGINX-wide config, there is fairly standard stuff. I copied + pasted most of this from the real default config. I did customize the log format to include the upstream request time which I like to see (this is how long it takes the upstream server, be it Flask or php-fpm or ASP.NET core takes to turn around the request). The IP addresses listed are Cloudflare servers and are where I should believe them when they say they’re forwarding from someone else. Note the last CIDR listed – 172.29.0.0/16. This is the docker network. There is actually a double forward going on and this is also necessary (real_ip_recursive is set to on).
nginx.conf:
# nginx.conf

user  nginx;
worker_processes  auto;

error_log  /var/log/nginx/error.log notice;
pid        /var/run/nginx.pid;


events {
    worker_connections  1024;
}


http {
    include       /etc/nginx/mime.types;
    default_type  application/octet-stream;

    limit_req_zone $binary_remote_addr zone=basic_limit:10m rate=8r/s;

    set_real_ip_from 173.245.48.0/20;
    set_real_ip_from 103.21.244.0/22;
    set_real_ip_from 103.22.200.0/22;
    set_real_ip_from 103.31.4.0/22;
    set_real_ip_from 141.101.64.0/18;
    set_real_ip_from 108.162.192.0/18;
    set_real_ip_from 190.93.240.0/20;
    set_real_ip_from 188.114.96.0/20;
    set_real_ip_from 197.234.240.0/22;
    set_real_ip_from 198.41.128.0/17;
    set_real_ip_from 162.158.0.0/15;
    set_real_ip_from 104.16.0.0/13;
    set_real_ip_from 104.24.0.0/14;
    set_real_ip_from 172.64.0.0/13;
    set_real_ip_from 131.0.72.0/22;
    set_real_ip_from 2400:cb00::/32;
    set_real_ip_from 2606:4700::/32;
    set_real_ip_from 2803:f800::/32;
    set_real_ip_from 2405:b500::/32;
    set_real_ip_from 2405:8100::/32;
    set_real_ip_from 2a06:98c0::/29;
    set_real_ip_from 2c0f:f248::/32;
    set_real_ip_from 172.29.0.0/16;

    real_ip_header CF-Connecting-IP;
    real_ip_recursive on;

    log_format main '$remote_addr - $realip_remote_addr - $remote_user [$time_local] "$request" '
                    '$status $body_bytes_sent "$http_referer" '
                    '"$http_user_agent" upstream_time=$upstream_response_time';

    access_log  /var/log/nginx/access.log  main;

    sendfile        on;

    keepalive_timeout  65;

    include /etc/nginx/conf.d/*.conf;
}
The NGINX Dockerfile does some magic in that it generates an unsigned SSL certificate so that things “work” via HTTPS (couldn’t figure out how to do plain HTTP within the docker compose but HTTPS externally). There is an option in the Cloudflare Tunnel to ignore SSL errors, which is enabled.
NGINX Dockerfile:
FROM nginx:alpine

RUN apk add --no-cache openssl

RUN mkdir -p /etc/nginx/ssl/ \
    && openssl req \
    -x509 \
    -subj "/C=US/ST=Denial/L=Nowhere/O=Dis" \
    -nodes \
    -days 365 \
    -newkey rsa:2048 \
    -keyout /etc/nginx/ssl/key.pem \
    -out /etc/nginx/ssl/cert.pem

COPY default.conf /etc/nginx/conf.d/default.conf
COPY nginx.conf /etc/nginx/nginx.conf

EXPOSE 8755

CMD ["nginx", "-g", "daemon off;"]
The Cloudflare Tunnel container is so simple there isn’t even a Dockerfile for it, just an entry in the docker-compose.yml.
Which brings us to the docker-compose.yml file. This is the “secret sauce” that brings it all together. This file defines a “stack” of related containers that form an application. This is still somewhat magic to me.
# docker-compose.yml

version: '3.8'

services:
  flask:
    build:
      context: ./flask_app
      dockerfile: Dockerfile
    environment:
      - FLASK_RUN_HOST=0.0.0.0
    restart: always

  nginx:
    build:
      context: ./nginx
      dockerfile: Dockerfile
    ports:
      - "8755:8755"
    depends_on:
      - flask
    restart: always


  cloudflared:
    image: cloudflare/cloudflared:latest
    command: tunnel --no-autoupdate run --token ${CF_TOKEN}
    restart: always
    environment:
      - CF_TOKEN

networks:
  default:
    ipam:
      config:
        - subnet: 172.29.0.0/16
Since it is magic, and I am still learning how to describe these various concepts, ChatGPT did a decent summary:
This docker-compose.yml file outlines a multi-container Docker application, specifically designed to run a Flask application behind an NGINX reverse proxy, with a Cloudflare tunnel for secure and fast network connections. The file is written in version 3.8 of the Docker Compose file format, ensuring compatibility with newer features and syntax.
Flask Service
The flask service is configured to build a Docker image from a Dockerfile located in the ./flask_app directory. The Dockerfile should contain instructions for setting up the Flask application environment. The FLASK_RUN_HOST environment variable is set to 0.0.0.0, allowing the Flask application to be accessible from outside the Docker container. The restart: always directive ensures that the Flask service is automatically restarted if it stops for any reason.
NGINX Service
The nginx service also builds its Docker image from a Dockerfile, which is expected to be in the ./nginx directory. This service is set up as a reverse proxy, forwarding requests to the Flask application. The ports directive maps port 8755 on the host machine to port 8755 inside the Docker container, making the NGINX server accessible from outside. The depends_on field specifies that the NGINX service depends on the Flask service, ensuring that Docker Compose starts the Flask service before starting NGINX. Like the Flask service, NGINX is configured to restart automatically if it stops.
Cloudflared Service
The cloudflared service utilizes the official Cloudflare tunnel image and runs the Cloudflare tunnel with the specified command. The CF_TOKEN environment variable, which should contain your Cloudflare tunnel token, is passed to the container through the command line. This service is also configured to restart automatically if it stops.
Networking
By default, Docker Compose sets up a single network for your application, and each container for a service joins the default network. In this case, an IPAM (IP Address Management) configuration is specified with a subnet of 172.29.0.0/16, ensuring that the containers receive IP addresses from this specified range.
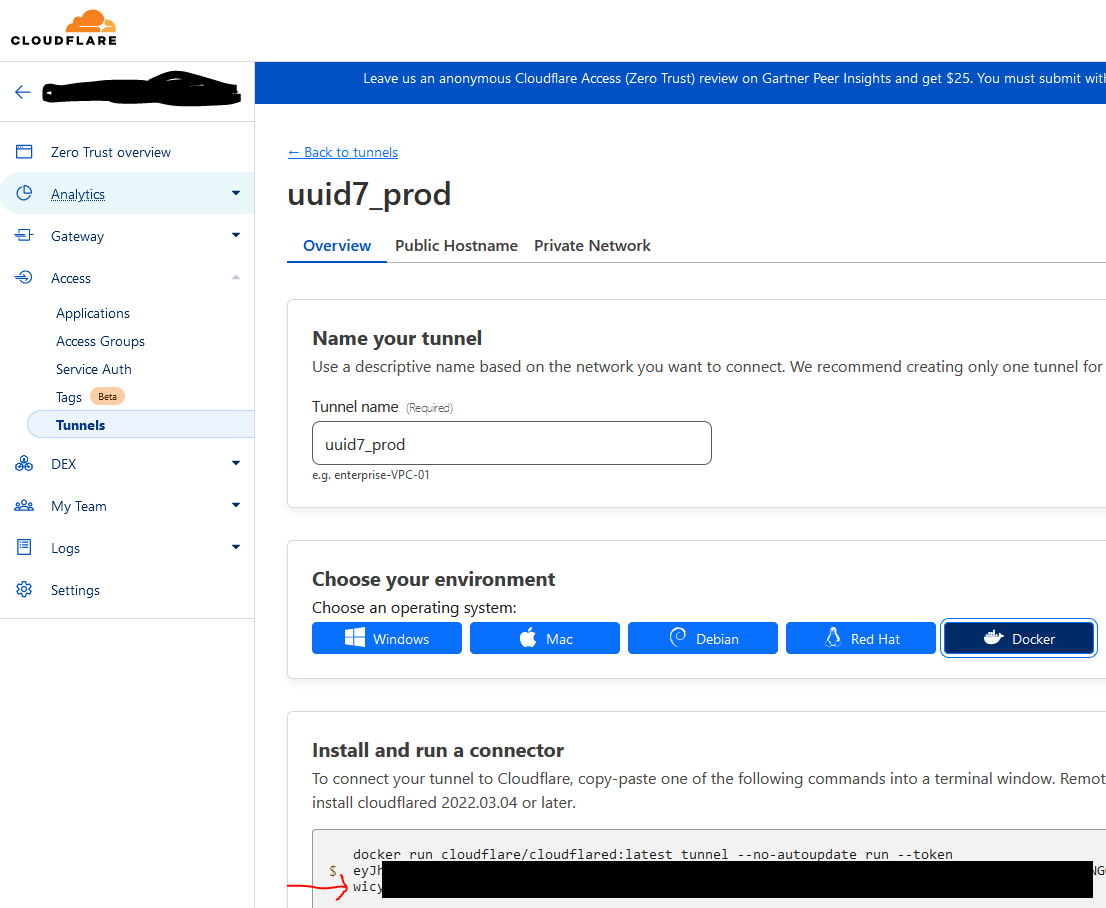
The Cloudflare Tunnel
If you don’t have one already, create a cloudflare account, and add your domain and prove ownership. Then go to Cloudflare zero trust area (usually under the access link). Create a tunnel. The token is the long alphanumeric string in the code box for any of the environment types. It always starts with ‘ey’:
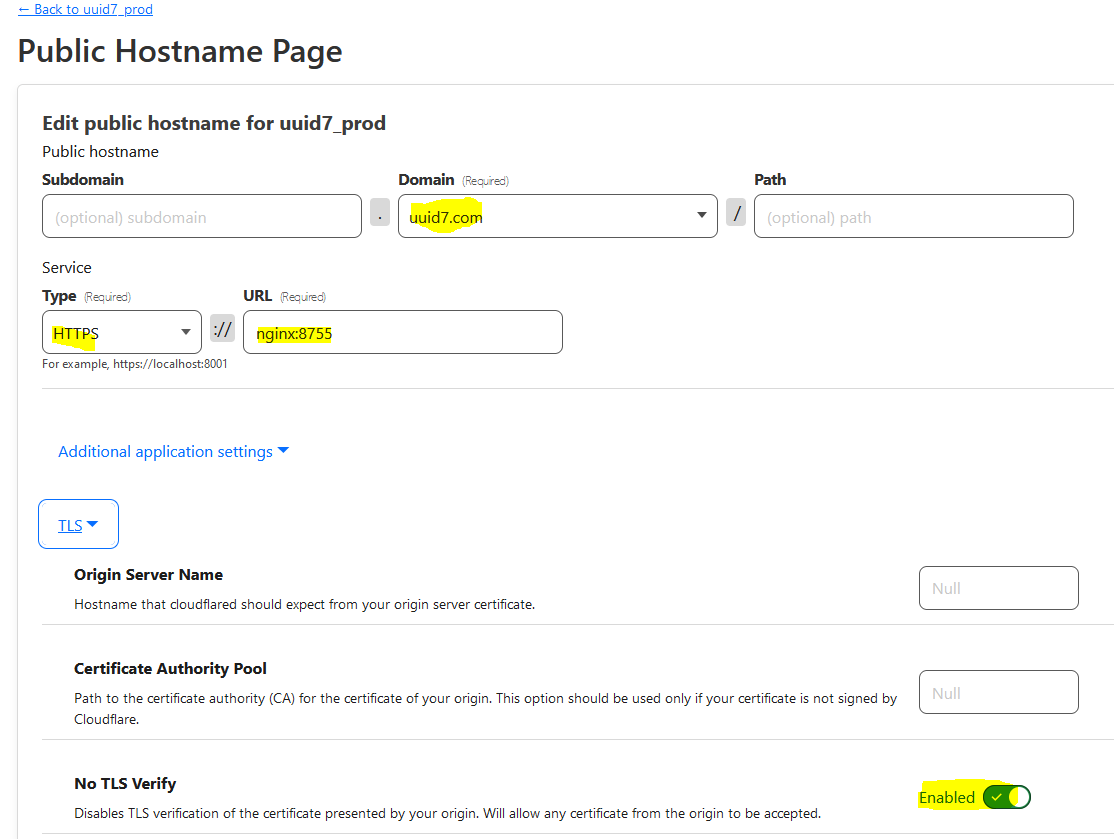
On the public hostname part, you need a minimum of the domain, type, and url. Here, the domain is obvious. It is going over HTTPS mostly because, again, I couldn’t figure out how to get it to do plain HTTP within the compose stack. The port here is where NGINX is listening and the hostname is the name of the NGINX container (simply ‘nginx’).
docker-compose up!
Replace ${CF_TOKEN} in your docker-compose.yml with the actual token for testing on your local machine. Then from the same folder that contains docker-compose.yml, run:
docker-compose up
The images will be built if necessary, and after they are built, they will be started and you’ll see output that looks something like this:
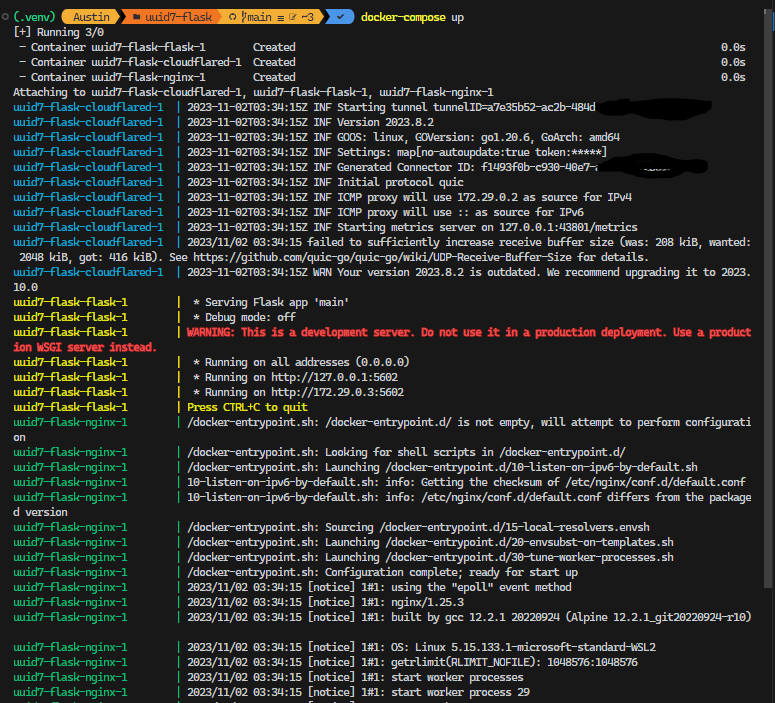
To kill, just do a Ctrl-C and wait for them to gracefully exit (or not).
A Place for the Stack to Live
We need a host where the docker stack can live and exist in a 24/7 uptime world. This is typically not your dev machine. I have a Dell R630 in a datacenter in the Denver Tech Center area. That will suffice. Create a VM/VPS somewhere (on a R630 in a datacenter, Azure, DigitalOcean, AWS EC2, etc), and install docker on it. Make sure you also install docker-compose. Further make sure you don’t install Docker on the Proxmox host by accident (oops). Then, install a self-hosted GitHub runner on the VM/VPS as well.
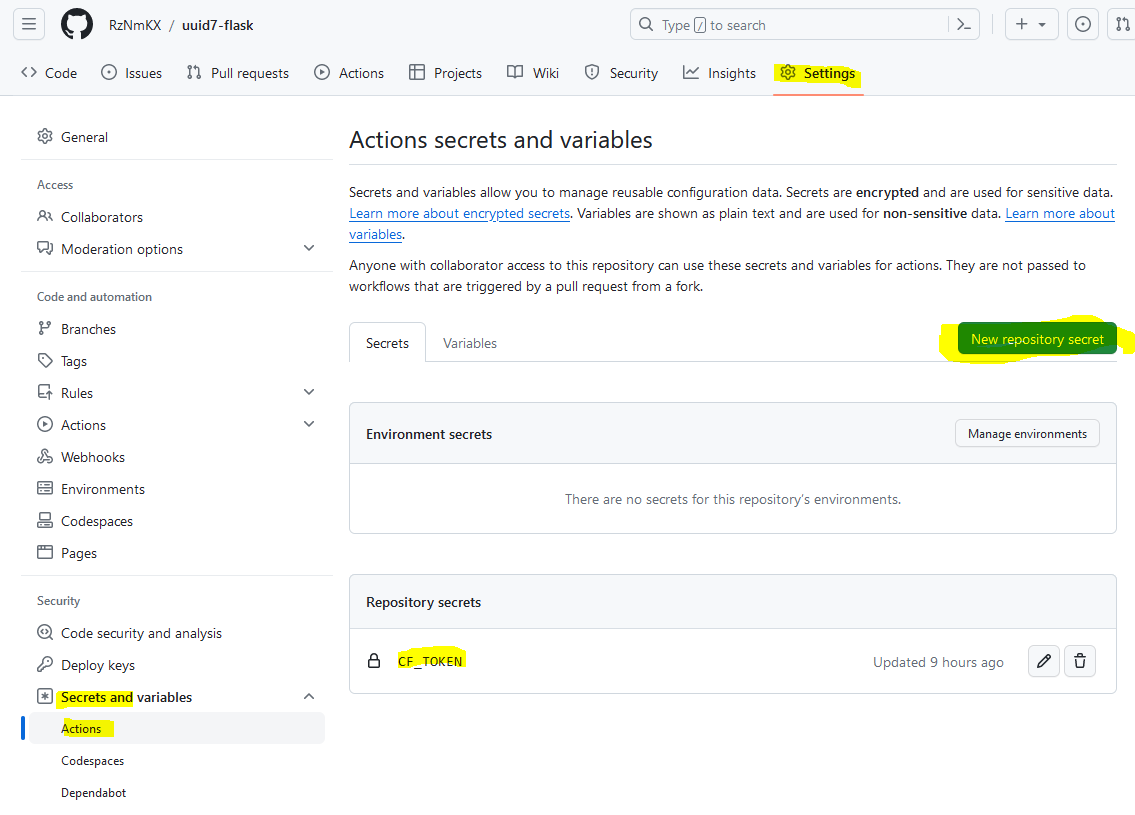
Create a secret in your repo with the Cloudflare Tunnel token, and name it the same thing as in your docker-compose.yml file (be sure to change that back!). I am using CF_TOKEN, which is represented in the docker-compose.yml file:
  cloudflared:
    image: cloudflare/cloudflared:latest
    command: tunnel --no-autoupdate run --token ${CF_TOKEN}
    restart: always
    environment:
      - CF_TOKEN
What your GitHub secrets will look like with a secret added:
GitHub Actions
Lastly, we need to define some actions to take place when certain events happen. In our case, we are interested in when the ‘main’ branch of the repo changes. This is my full .github\workflows\main.yml file:
name: Docker Deploy

on:
  push:
    branches:
      - main

jobs:
  deploy:
    runs-on: self-hosted
    steps:
      - name: Checkout Code
        uses: actions/checkout@v2

      - name: Set up Docker Compose
        run: echo "CF_TOKEN=${{ secrets.CF_TOKEN }}" >> $GITHUB_ENV

      - name: Navigate to Code Directory
        run: cd ${{ github.workspace }}

      - name: Run Docker Compose Up with Sudo
        run: sudo -E docker-compose up -d --build
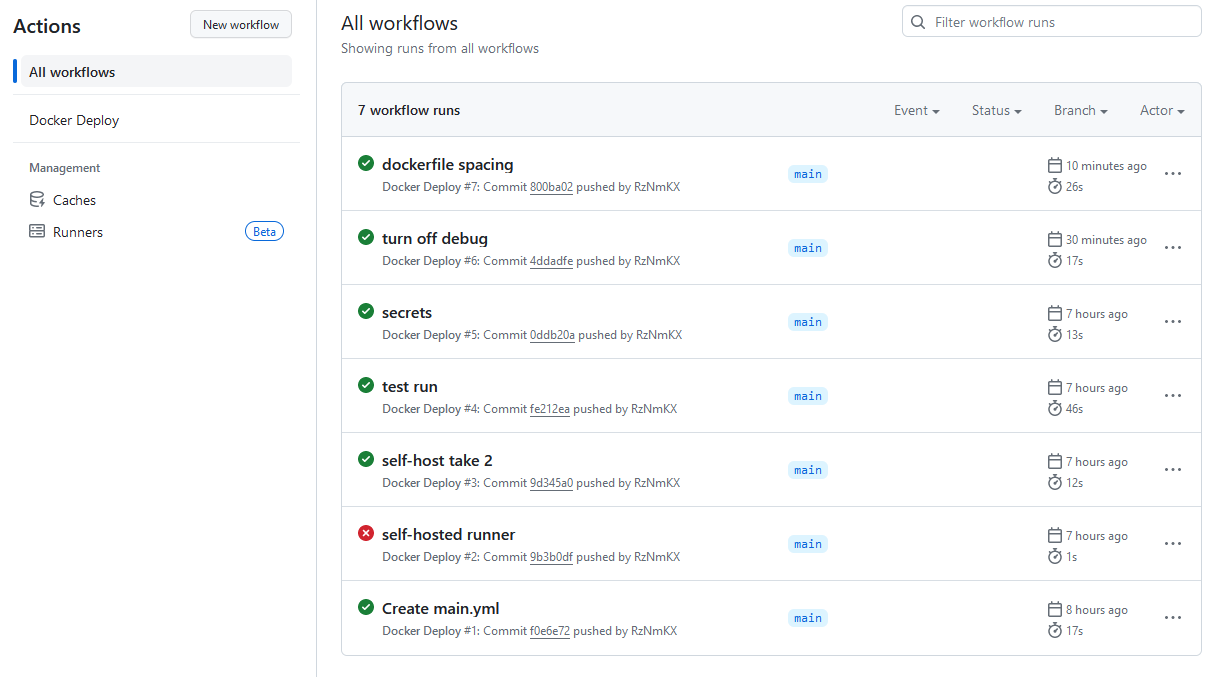
Now, when you commit, it will reach out to your self-hosted runner, which will pull your code, insert the CF_TOKEN secret into the environment variables, and then run the docker-compose up command to get your stack going. Here are a couple executions. You will likely have a couple misfires when setting up the pipeline if you are doing something different than me. My record is 19 tries (read: failures) in Azure DevOps to get a build/release pipeline fully functional.
Conclusion
This post turned out to be far longer than I anticipated. I hope you find it helpful! As noted earlier, the vast majority of this is essentially copy + paste. By that, I mean once you do it once, you can easily do it again. You can run these docker compose stacks pretty much anywhere.
There is a “feature” of Cloudflare Tunnels in that they say they are randomly routed if there is more than one active tunnel. I have not tested this but this allows for some interesting possibilities. For sites that have zero persistence, like the uuid7.com example site, that means I can run this stack in more than one place for redundancy by just doing a git pull/docker-compose up.
Docker containers take very little memory/CPU:

Run wild!
Repo with all the project files here – https://github.com/RzNmKX/uuid7-flask