
Been a while since I last posted. For basically everything I do Linux-wise, I use Ubuntu. Specifically the Long Term Support versions, which are released on even years in April (April 2020, April 2022, etc.), hence the 22.04 designation of the latest LTS, Jammy. I had standardized on 20.04 (Focal) for everything, but am finding that various packages I use that I expect to be available on 20.04, aren’t. But they are present in standard, default package lists for Jammy 22.04. Last night I was creating a new VM to transfer this very blog to my shiny, new co-located server. I was going to use the Ubuntu 20.04 Proxmox Cloud Init Image Script template I wrote up a bit ago. Then I stopped and realized I should update it. So I changed 2004 everywhere in the script to 2204 and ‘focal’ to ‘jammy’, reran it, and now I have a fancy new cloud init script for Ubuntu 22.04. Note that this script does require you to install libguestfs-tools, as indicated in the previous cloud-init post.
ChatGPT enhanced script as of 2023:
#!/bin/bash

##############################################################################
# things to double-check:
# 1. user directory
# 2. your SSH key location
# 3. which bridge you assign with the create line (currently set to vmbr100)
# 4. which storage is being utilized (script uses local-zfs)
##############################################################################

DISK_IMAGE="jammy-server-cloudimg-amd64.img"
IMAGE_URL="https://cloud-images.ubuntu.com/jammy/current/$DISK_IMAGE"

# Function to check if a file was modified in the last 24 hours or doesn't exist
should_download_image() {
    local file="$1"
    # If file doesn't exist, return true (i.e., should download)
    [[ ! -f "$file" ]] && return 0

    local current_time=$(date +%s)
    local file_mod_time=$(stat --format="%Y" "$file")
    local difference=$(( current_time - file_mod_time ))
    # If older than 24 hours, return true
    (( difference >= 86400 ))
}

# Download the disk image if it doesn't exist or if it was modified more than 24 hours ago
if should_download_image "$DISK_IMAGE"; then
    rm -f "$DISK_IMAGE"
    wget -q "$IMAGE_URL"
fi

sudo virt-customize -a "$DISK_IMAGE" --install qemu-guest-agent
sudo virt-customize -a "$DISK_IMAGE" --ssh-inject root:file:/home/austin/id_rsa.pub

if sudo qm list | grep -qw "9022"; then
    sudo qm destroy 9022
fi

sudo qm create 9022 --name "ubuntu-2204-cloudinit-template" --memory 2048 --cores 2 --net0 virtio,bridge=vmbr100
sudo qm importdisk 9022 "$DISK_IMAGE" local-zfs
sudo qm set 9022 --scsihw virtio-scsi-pci --scsi0 local-zfs:vm-9022-disk-0
sudo qm set 9022 --boot c --bootdisk scsi0
sudo qm set 9022 --ide2 local-zfs:cloudinit
sudo qm set 9022 --serial0 socket --vga serial0
sudo qm set 9022 --agent enabled=1
sudo qm template 9022

echo "Next up, clone VM, then expand the disk"
echo "You also still need to copy ssh keys to the newly cloned VM"
Original, non-ChatGPT script:
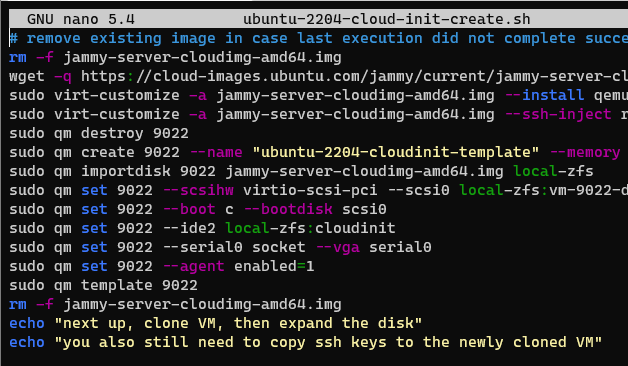
###############
# things to double-check:
# 1. user directory
# 2. your SSH key location
# 3. which bridge you assign with the create line (currently set to vmbr100)
# 4. which storage is being utilized (script uses local-zfs)
###############

rm -f jammy-server-cloudimg-amd64.img
wget -q https://cloud-images.ubuntu.com/jammy/current/jammy-server-cloudimg-amd64.img
sudo virt-customize -a jammy-server-cloudimg-amd64.img --install qemu-guest-agent
sudo virt-customize -a jammy-server-cloudimg-amd64.img --ssh-inject root:file:/home/austin/id_rsa.pub
sudo qm destroy 9022
sudo qm create 9022 --name "ubuntu-2204-cloudinit-template" --memory 2048 --cores 2 --net0 virtio,bridge=vmbr100
sudo qm importdisk 9022 jammy-server-cloudimg-amd64.img local-zfs
sudo qm set 9022 --scsihw virtio-scsi-pci --scsi0 local-zfs:vm-9022-disk-0
sudo qm set 9022 --boot c --bootdisk scsi0
sudo qm set 9022 --ide2 local-zfs:cloudinit
sudo qm set 9022 --serial0 socket --vga serial0
sudo qm set 9022 --agent enabled=1
sudo qm template 9022
rm -f jammy-server-cloudimg-amd64.img
echo "next up, clone VM, then expand the disk"
echo "you also still need to copy ssh keys to the newly cloned VM"
I suppose for a full automation I should get user with a whoami command, assign it to a variable, and use that throughout the script. That’s a task for another day.
I also added a line in my crontab to have this script run weekly, so the image is essentially always up to date. I’ll run both 20.04 and 22.04 in parallel for a bit but anticipate that I can turn off the 20.04 job fairly soon.
# m h  dom mon dow   command
52 19 * * TUE sleep $(( RANDOM \% 60 )); /usr/bin/bash /home/austin/ubuntu-2004-cloud-init-create.sh >> /home/austin/ubuntu-template.log 2>&1
52 20 * * TUE sleep $(( RANDOM \% 60 )); /usr/bin/bash /home/austin/ubuntu-2204-cloud-init-create.sh >> /home/austin/ubuntu-2204-template.log 2>&1
2 replies on “Proxmox Ubuntu 22.04 Jammy LTS Cloud-init Image Script”
Check out this github repo for this, but it also does the downloads, checks the SHA256 hash of the download, copies your SSH keys, etc for multiple versions and multiple distros:
https://github.com/TechByTheNerd/cloud-image-for-proxmox
Austin, super useful post. Thought I would post the following in case someone wants to use dhcp and also set the hostname at boot!
below this line, add another line as follows:
sudo qm set 9022 –agent enabled=1
add another line as follows:
qm set $VMID –smbios1 serial=$(echo -n “ds=nocloud;hostname=$HOSTNAME” | base64),base64=1
Also in any terraform sript you might like to add
ipconfig0 = “ip=dhcp”
The above should result in the vm booting with the correct hostname(supplied via terraform, rather than in the vm template). And should, most importantly register the “new” hostname with dhcp and dns. For my setup, I am using proxmox 8.0.3, with dhcp4 enabled and unbound for DNS.
One other thing, I also did, was to truncate the hostname using virt-customize. Have not had time to confirm if this is required, but just in case someone has time to establish if this is required, or cannot get the above to work.
sudo virt-customize -a jammy-server-cloudimg-amd64.img –run-command ‘sudo echo localhost > /etc/hostname’
sudo virt-customize -a jammy-server-cloudimg-amd64.img –run-command ‘sudo cloud-init clean –logs’
sudo virt-customize -a jammy-server-cloudimg-amd64.img –truncate /etc/machine-id
The truncate machine-id is needed as the last entry, to ensure that each new vm has a unique machine-id which is used for the dhcp reservation on ubuntu. And yes, that took a lot of time and effort to establish.
Appreciate your post and keep up the great work, it really helps