Coming from Learning Swift (the programming language), I have completed Assignment 1 (including extra credit #1, but not #2). Most of the tasks were relatively straight-forward. I did not do any of the reading.
The last post had a fully functional game working as described in lectures 1 & 2. This assignment built from that.
Some brief notes on the required tasks:
- Easy. Done on the last post.
- Also easy.
- Not too hard, just added a new struct called TitleView and plopped it before the ScrollView in the VStack
- I tried to figure out a way to have the emojis var populated with the contents of a different emoji list (e.g. vehicleEmojis, as in var emojis = vehicleEmojis), but wasn’t successful. This will probably be covered in lecture 3. I ended up just hardcoding the initial list to be the same values as the vehicleEmoji string array. The buttons themselves were pretty straightforward.
- The hardest part about this was figuring out how to use the emoji browser so I didn’t have to close and re-open it for every new emoji. I did vehicles, animals, and fruit.
- array.shuffled(), easy
- VStack the system images with text
- Okay, I suppose I can do that. I picked the fruit emojis before realizing there weren’t specific fruit symbols. In SF 2, there is a leaf, which is close enough. This seems a bit nit-picky.
- font(.body)
- ok
Extra credit:
- set emojiCount to be a random value from 4 (minimum specified in the task) up to yourEmojiListVar.count. easy. do this after shuffling though
- this seems like a lot of work for something I don’t really need to do yet
Code
//
// ContentView.swift
// Memorize - Stanford CS193p, Spring 2021
// After assignment 1
//
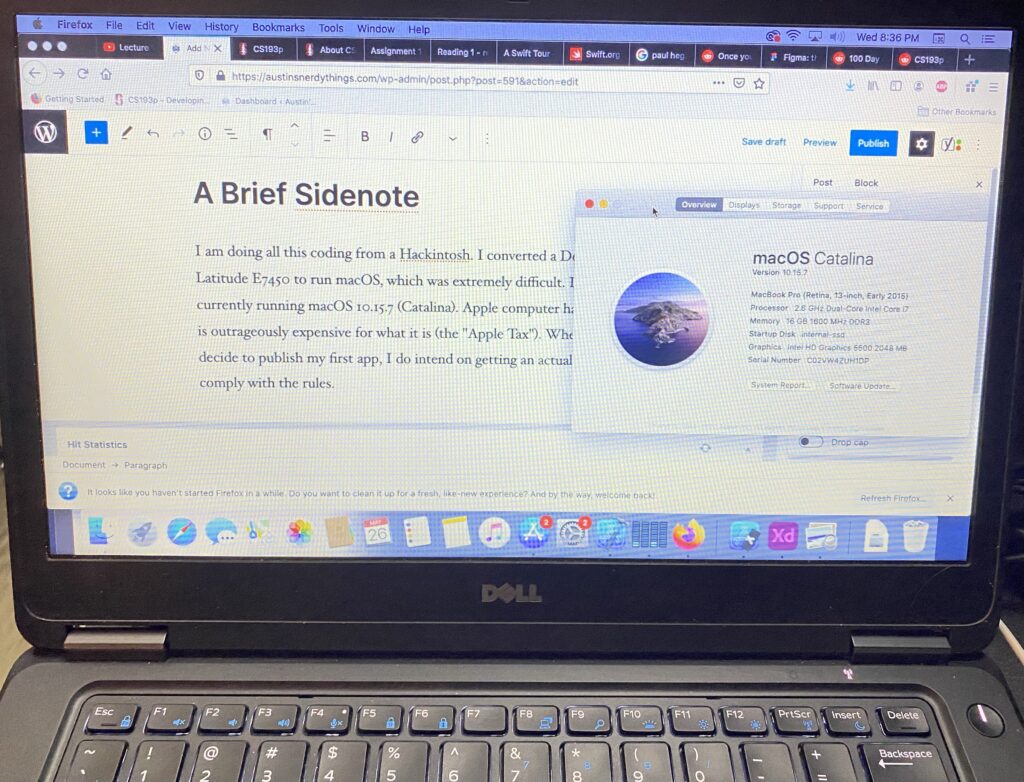
// Created by Austin from austinsnerdythings.com on 5/27/21.
//
import SwiftUI
struct ContentView: View {
var vehicleEmojis = ["?","?","?","?","?","?","?","?","?","?","?","?","?","✈️","?","?","?","?","?","?","?","?","?","?"]
var animalEmojis = ["?","?","?","?","?","?","?","?","?","?","?","?"]
var fruitEmojis = ["?","?","?","?","?","?","?","?","?","?","?","?"]
@State var emojis = ["?","?","?","?","?","?","?","?","?","?","?","?","?","✈️","?","?","?","?","?","?","?","?","?","?"]
@State var emojiCount: Int = 8
var body: some View {
VStack {
TitleView()
ScrollView {
LazyVGrid(columns: [GridItem(.adaptive(minimum: 80))]){
ForEach(emojis[0..<emojiCount], id: \.self) { emoji in
CardView(content: emoji)
.aspectRatio(2/3, contentMode: .fit)
}
}
}
.foregroundColor(.red)
Spacer()
HStack {
vehicleTheme
Spacer()
animalTheme
Spacer()
fruitTheme
}
.font(.largeTitle)
.padding(.horizontal)
}
.padding()
}
var remove: some View {
Button {
if emojiCount > 1 {
emojiCount -= 1
}
} label: {
Image(systemName: "minus.circle")
}
}
var add: some View {
Button {
if emojiCount < vehicleEmojis.count {
emojiCount += 1
}
} label: {
Image(systemName: "plus.circle")
}
}
var vehicleTheme: some View {
Button(action: {
emojis = vehicleEmojis.shuffled()
emojiCount = Int.random(in: 4..<vehicleEmojis.count)
}, label: {
VStack{
Image(systemName: "car").font(.largeTitle)
Text("Vehicles").font(.body)
}
})
}
var animalTheme: some View {
Button(action: {
emojis = animalEmojis.shuffled()
emojiCount = Int.random(in: 4..<animalEmojis.count)
}, label: {
VStack{
Image(systemName: "hare").font(.largeTitle)
Text("Animals").font(.body)
}
})
}
var fruitTheme: some View {
Button(action: {
emojis = fruitEmojis.shuffled()
emojiCount = Int.random(in: 4..<fruitEmojis.count)
}, label: {
VStack{
Image(systemName: "leaf").font(.largeTitle)
Text("Fruits").font(.body)
}
})
}
}
struct CardView: View {
var content: String
@State var isFaceUp: Bool = true
var body: some View {
ZStack {
let shape = RoundedRectangle(cornerRadius: 20)
if isFaceUp {
shape.fill().foregroundColor(.white)
shape.strokeBorder(lineWidth: 3)
Text(content).font(.largeTitle)
} else {
shape.fill()
}
}
.onTapGesture {
if isFaceUp == true {
isFaceUp = false
} else {
isFaceUp = true
}
}
}
}
struct TitleView: View {
var body: some View {
HStack {
Spacer()
Text("Memorize!").font(.largeTitle)
Spacer()
}
}
}
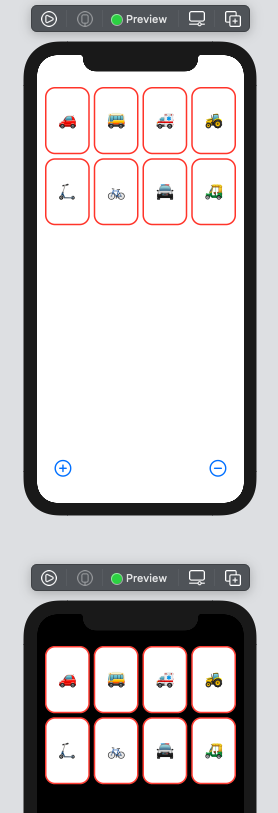
struct ContentView_Previews: PreviewProvider {
static var previews: some View {
ContentView()
.preferredColorScheme(.light)
ContentView()
.preferredColorScheme(.dark)
}
}
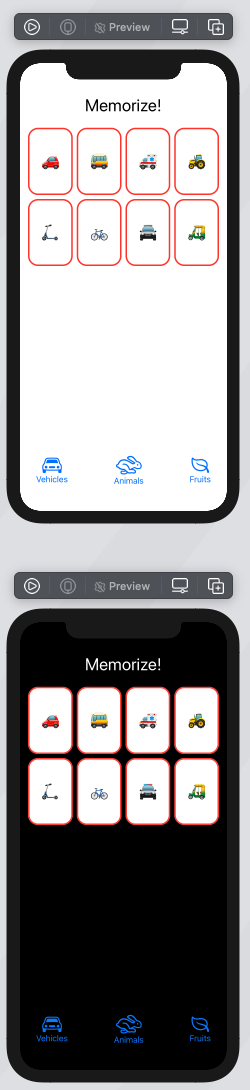
Screenshots
Next up – lecture 3
Link to post about lecture 3 here.